Jana

Jana

Wednesday, August 31, 2011

Wednesday's Cleaning: Using everyday items around the house; Part 2: Citrus

Cleaning products all around us have "Clean with citrus!" or "Lemon Power!" or something along those lines. So, if cleaning with citrus is all the rage, then why don't we actually clean with citrus?! I've already mentioned using citrus in my post "Air Fresheners"; now I'm going to look at these lovely fruits for ways to make our house that much cleaner. 


http://www.123rf.com/photo_4795577_lemon-and-two-oranges-on-a-light-background.html


Oranges (most of these involve dried orange peels. So, pull out your dehydrator after having a few oranges, dry some peels and get to work on cleaning up around your house)


1. Insect repellent. Duh! Oh my word, why did I not think about this before?! I remember noticing not too long ago "orange scented" bug repellents. You know why? Bug just don't like the smell. Set out a few peels near your windows, doors, and patio furniture, and the bugs are discouraged from invading your space. Also, take some orange peel powder and water, make a line around an ant bed, and they are then discouraged from crossing the line (wish I had known this two weeks ago before I had to do a funky cut of the yard with the lawn mower because of the massive ant beds!) 


2. Air Freshener. In addition to the air freshener I mentioned in another post, you can also place a few orange peels in the oven, on the rack, and cook for 5 minutes or so. (This should also help in drying your peels for other uses as well!). You can also put a few orange peels in a cotton bag (like an old pillowcase) and hang it in closets to get rid of the musty smells. 


3. Appliances: Use the peels to shine your metal appliances. 


4. Flames!!! I have done my fair share of camping, hiking, and backpacking and knew that oranges were great kindling. The juice you get from squeezing an orange can be highly flammable, so while camping (or I guess while you are setting a fire in your fire place), toss a few orange peels in there to get the flames going. (Who knew?!) 


5. Deodorant. Mix orange peel and lemon peel with a little powder, and you have yourself a homemade deodorant. 


Lemons: (Think of those Japanese restaurants. Ever watch them clean the grills after they are done chopping, flipping, setting things on fire, etc? What do they use? A little lemon, cut in half, water, and a rag. It's as easy as that!) 


1. Scrubbing stuff. Just like mentioned above, lemons are great for cleaning quickly, cutting the grease, and leaving a great smell. Use a lemon to scrub the inside of your oven; dip a lemon in some salt and scrub the hard to get off stuff. 


2. Did you say "Wood"? (extra credit if you get that allusion). Mix 1 cup of olive oil with 1/2 cup of lemon juice for a homemade furniture polish. 


3. Mixing with friends. Mix lemon juice with vinegar for a bathroom cleaner. This mixture is a great soap scum killer and does well on hard water deposits. 


4. Makes your whites whiter! Lemon juice is a natural bleacher. Rub a little on a stain, let it dry in the sun, and then wash away (you girls that used lemon juice to dye your hair as a teenager are all probably smacking your forehead right now). 


So as citrus season approaches, fill your fruit baskets with lemons and oranges, but don't throw away those peels. Dry them, squeeze them, boil them, but whatever you do, don't throw them away! 


For the schedule of this series, go here. Next week's cleaning post: Salt. 


Resources: 
1. http://factoidz.com/green-clean-tips-how-to-use-oranges-in-household-cleaning/
2. http://allnaturalbeauty.us/herbal_powders_deodorants.htm
3. http://www.greenlivingtips.com/articles/176/1/Orange-peel-tips.html
4. http://housekeeping.about.com/od/environment/a/lemonscleaning.htm
5. http://www.easy-homemade-recipes.com/lemon-cleaner.html (Didn't actually put anything on here from this site, but she has recipes to make Lemon Cleaners) 
6. http://housekeeping.about.com/cs/environment/a/alternateclean.htm


Tuesday, August 30, 2011

Tuesday's Food: Making Yogurt in a crockpot

Mmm...Yogurt. I love the stuff. I mean really, really love the stuff. We spend so much money in our household on yogurt, it's not even funny. So, as I was looking through Stephanie O'Dea's crockpot blog for my next recipe,  I about squealed with excitement on finding a recipe for making yogurt in the crockpot. As of late, I have found that reading all the comments are more beneficial on how to adjust the recipe for my family. I normally try to make the recipe just as it is stated at first so I know how it was originally supposed to taste and how I want it to taste. I tried this recipe for the first time with...GASP...adjustments. If you would like to follow the original recipe, see the link above. Here is what I did:

1. Ingredients: 1/2 gallon of 2 % milk, 1/2 cup yogurt (as a starter, this gets the live culture in there), 1 packet of plain gelatin (this helps thicken the yogurt. You can also use dried milk), 2 tsp of vanilla, and fresh or frozen fruit (optional)

2. In a medium to large crockpot, add milk, vanilla, and gelatin.

3. Cover and cook on low for 2 1/2 hours (enough time for me to go to the gym)

4. Unplug the crockpot, and let the mixture sit for three hours. This was a enough time for us to eat dinner (leftover Applesauce Chicken and wild rice, a twist on chicken bog).


5. After 3 hours, measure out 2 cups of the warm mixture into a bowl and whisk in the 1/2 cup of the store's yogurt. Pour back into crockpot and stir all.

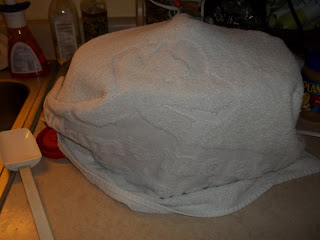
6. Put the lid back on, cover the entire crockpot with a heavy bath towel for 8 hours. This is why I started mine in the late afternoon. I wanted it to sit while I was sleeping, so I wasn't tempted to keep checking it. :)


7. After 8 hours, your yogurt should be done! Place in a air tight container. Make sure to set aside 1/2 cup for your starter so you don't have to buy anymore store yogurt to make your own.


8. At this point, you can add your fruit or whatever you like to your yogurt. NOTE: the longer it sits in the fridge, the thicker it gets. After day 3, mine was pretty thick (not greek yogurt thick, but thick).

Here are a few things I did with my yogurt:

a. Made smoothies that my daughter and I shared. I mixed strawberries, a little cinnamon, and bee pollen:


b. I also made pancakes with yogurt instead of just milk.
c. I mixed some yogurt with dark chocolate instant carnation for a yummy breakfast.
d. I also mixed it with dark chocolate hot chocolate mix for a dessert.

NOTE: this makes a TON of yogurt and is most definitely cost effective. It's good for you because you can control the fat and sugar content to your desire. The original recipe calls for whole milk, but I'm not a big fan of whole milk. I am going to try it to see if it changes the taste/consistency.

Give it a shot and let me know what you think. I really don't think you will regret this recipe!


Friday, August 26, 2011

Friday's Curriculum Review: Creation

So, I know it's been forever since I posted a review on the curriculum. It's not that we don't do it. It's more like I forgot to take pictures (and posts without pictures are boorrriinng) or life just happened and I never got to it. BUT I'm working on this early to get it posted after we finish this week's lesson (tomorrow morning...ish). So here goes....


Since it's just Abigail and me at  home, I have gone back to using the curriculum for 3 year olds. She could handle some of the 4 year old stuff, but some of it was a bit overwhelming...and I still have one more school year to get through with her before she starts school. I am still using the same resource as always, Hubbard's Cupboard. If you would like to read my review on this site, go here. The 3 year old curriculum is meant for 3 days, but could easily made into 4 or 5 days, depending on if you do it all or not.

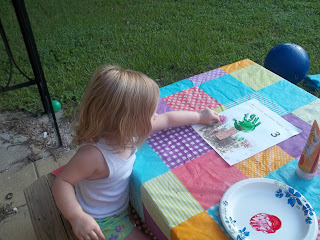
Here's the little princess ready for this week's activities

This week's lesson was combined with last week's since it was about Creation. Last week, we talked about Creation as a whole, watched a video on Creation, and then began activities for days 1, 2, and 3. Every night at dinner, I had Abi discuss what she learned that day with the rest of the family. It took all week for her to get past the fact that God made more than just a rainbow. She was really stuck on that. :)

Here's a few pics on activities with days 1-3:

1. Day 2: God Created the Sky and Sea....so, we made the ocean.

2. See how it works?

3. On the 3rd Day, God made the land, trees, grass, and flowers. Getting the glue ready to add dirt...

4. And we have land! (she didn't like the dirt part too much)

5. Then we made the trees, grass, and flowers:

6. Final product of 3rd day:

Here we go on week 2 with days 4-7 of creation: 


7. On the 4th day, he made the sun, moon, and stars...here we glitter!!!


8. On the 5th day, God made animals that fly and swim. So we decided what would be good examples of each:

9. Check out my craftiness! Here are some birds and fish!

10. Final product of day 5

12. On the 6th day, God beasts of the land and MAN! Yay! So, we tried our hand at molding...

12. On the 7th day, God was finished....

13. ...and he rested.

14. A review game of all the days:

15. She had to put them in order (she did pretty well, actually!)

16. And Ta-Dah! We are done with this week! Yay!


Next week won't be as much content, but it was important to cover all of these as quickly as possible and still be good. Next week's curriculum: The Fall of Man (time to buy some apples!) 

Blog under construction

Hey all. I'm trying out a few things on my blog. I'm making some visual adjustments. So please be patient with me as I get a little more comfortable with how everything is set up in the blog. Thanks a ton!

Guest Blog Post: Java Roast

Remember me telling you about my friend, Tara, and I going through some crockpot recipes? Today she is posting a yummy recipe called "Java Roast". And, Oh My Word, this looks YUMMY! Please go by her blog, post comments, follow her page (for you homeschool parents, she is a great resource for ideas on this as well! An all-around talented chick!) 


Here's her post for today: 


Hi, I am Tara aka OrganizedSahm. A little bit about me: I am a mom to three wonderful Things. I love boot cut jeans. I start and sometimes end every day with coffee. My favorite accessory is a pair of pearls. I love to cook, write and sew. I am an extroverted introvert just trying to raise extraordinary Things!
It's Friday! You know how I love slow cooker Fridays! I thought I would quickly share my thoughts about Stephanie's Java Roast. In case you are new, Jana Debney and I are cooking through Stephanie O'dea's recipes. We will deliver 4 reviews every two weeks. You will see the reviews here and on Just Makin' It. Say "Hi" to Jana and let her know you stopped by to see what she's been Makin'.
Here is the link to the original recipe: Java Roast Crock Pot Recipe.
First, let's talk about roast and cooking it in the slow cooker. I want to run through my thoughts about browning and thawing because I read through all the comments under Stephanie's recipe post and there were some questions about this. I want to make sure to cover those on this post.
To brown or not to brown? This is totally up to you. Does it change the flavor of the meat if you don't season it before you brown it? Not that I can tell. What's the purpose? Well, in this case, for this recipe, none. Most of the time you brown meat to lock in your flavor. Say you threw some spice on there with some flour: you would brown that meat to lock it in. The only other reason you brown is for the presentation factor. Meat that has been browned looks prettier. Personally, I think it's a waste of time for roast that is going to be slow cooked... but that's just me. If you brown before you place your roast in a crock pot, awesome! I am sure it looks better than mine. I skip it because I like the idea of throwing it all together without the work.
Frozen or thawed? Again, that's up to you. I NEVER thaw my meat. I'm a lazy slowcooker. When I plan a slow cooked meal, that's it... I am planning on not fussing over it. So I don't thaw. Now, there have been days where I had no intentions of slow cooking chicken and I left it out to thaw only to realize I needed to run out for errands. In those cases, usually the chicken is thawed when I make that last-minute decision to throw it in the slow cooker.
If you are new to my blog you will quickly find out that unless I am baking, it's impossible for me to stick to a recipe. I like trying out other peoples' recipes while adding my flare to them. Which brings me to what I did with this recipe.
I knew that I was going to be blogging this recipe. I did try very very hard to stick by it for your sake. So,...let's get to it.
Java Roast
Adapted from A Year of Slow Cooking
First, you need a roast... obviously. What kind? A Chuck roast. It just so happened I had one in my freezer. Perfect!
1 1/2 cups brewed coffee
1/2 medium-sized onion
1 red bell pepper
Recipe calls for 8 oz of sliced mushrooms- I used half a container.
1 tbsp minced garlic
salt and pepper to taste
2 tbsp Worcestershire
3 Tbsp Red Wine Vinegar
4 oz Cream Cheese (room temperature)
Place the sliced vegetables in your slow cooker.

Now grab your roast and place it on top of your vegetables.

Again mine was frozen solid! Add your liquids and spices! Turn it to low and let it go! Note: Mine was frozen solid and I started it after lunch sometime around 1:00pm. I cranked her up to high and cooked it on high until 6pm. The meat was falling apart tender! Before you are ready to eat, add your room temperature cream cheese to your pot. I believe the recipe called for the cream cheese so that it would thicken the sauce. I have added cream cheese many times to crock pot recipes and here is what I can tell you. It's going to clump unless you add it in somewhere in the middle and give it time to cook down. I added it in the end in the tiniest pieces, stirring, and let it cook for a few minutes and mine still had tiny clumps. 2-3 tbsp of corn starch would work just as well without the fuss. The taste. This is hard for me to review. We have been spoiled by our favorite slow cooker roast recipe and the man bit into it and said... "Where's the kick? Where's the flavor?" My tongue is pretty trained now and I could immediately pick out all the flavors in this recipe and enjoyed them. Is it good? YES! Please try it... However, it simply didn't knock our favorite off the gold medal podium.

It was moist, tender and I thought it was pretty good. Not your everyday roast recipe.
Try it out this Friday! Enjoy!

Thursday, August 25, 2011

Thursday's Crafting: Purse or Diaper Bag


A few weeks ago, my sister-in-law added another girl to the family with the birth of their little girl, Cosi. Since I'm all about providing gifts people actually use and something that is personal, I made little Cosi and her mama, Emily, a cute little diaper bag that can later be turned into just a purse for Emily or an overnight bag for Cosi. It was a lot easier than I thought. This is the 2nd one I have done, and each time I find easier and easier ways to do this.

* Note: you can adjust these measurements if you don't want a bag this big. These measurements are based off the two bags I have done. Also, the inner fabric I used was one of those plastic tablecloths with the soft underlining. This works well so if there is something wet on the inside, it can easily be wiped off and not ruin the entire bag.

Materials:

1. Outer fabric (OF): 34x19 inches (bag); 16x19 inches (to cover the bag's opening. You can just add this on to your inches, like I did, or sew this on separately)
2. Inner fabric (IF): 32x17 inches in matching or coordinating fabric.
3. 32x4 inch outer fabric (for strap)
4. 12x3 inch inner fabric (for added padding in the strap)
5. Matching thread
6. a cutting board, scissors, and a sewing machine

Steps: (Note: My instructions are slightly different from the pictures. It was one of those, "Oh! I should have done that!" thing after the product was complete).

1. Strap:

  • Measure and mark the center of OF and IF. Line up the centers with and pin. 
  • Sew the two together
  • Fold in half with right sides facing each other (to make a 32x2 inch strap). Sew and turn inside out. 
  • Set aside


2. Bag

  • With right sides facing each other, fold OF over the edge of the IF. Sew 3 sides. Flip inside out. 
  • Here is where the pictures begin to be different, AND this is where you can do the optional closing cover
  • Closing cover: Hem three of the edges. Tuck the opening between the OF and IF on side of the bag. Pin


    • Straps: on the side seams of the bag, tuck the ends of the strap. Pin. 
    • On the other opening (where the closing cover is NOT), fold the OF and IF in and pin. 

    • Do a fancy stitch around the entire opening of the bag. 
    • And voila! You should be done! 


    With it open
    With it closed

    Wednesday, August 24, 2011

    Wednesday's Cleaning: Using everyday items around the house; Part 1: Vinegar


    As mentioned last week, for the next 5 weeks, I am going to be posting on ways to use everyday items around the house to clean. If you need to see the schedule, go here. This week, I will focus on the use of Vinegar around the home. 


    Cleaning with Vinegar: 

    Photo credit: 


    1. Vinegar can be used by itself to clean quite a few objects. Just place a small amount on a paper towel or cloth and rub away at grease, dust, and dirt. Make sure to use it on non-porous surfaces, if you are using it by itself. NOTE: never use vinegar on marble. It will damage the marble. 
      • Refrigerator: wipe down the grease build up on top of the fridge; wipe down the shelves inside the fridge during your monthly deep cleaning. Do this in the evening, and leave it to dry overnight. 
      • Grout, grim, mildew, scum: clean with a vinegar-soaked towel or pour on directly. If cleaning the toilet, pour at least a cup of vinegar in the bowl and let it sit overnight before scrubbing with brush and then flushing. 
      • Making surfaces shiny: simply rub or soak with vinegar. Wipe dry. (A fun one for kids is to let pennies soak for a couple of hours. They will come out shiny!)
         2.  Vinegar can be used with a friend to clean so many things. Find a few spray bottles, a buddy to go with vinegar (mostly her two best friends water and baking soda), and a marker to clearly label what the concoction is and what it can be cleaned with it. 
    1. With water (W&V for future references): 1) boil 1/2 c. water and 1/2 c. of vinegar in a microwaveable bowl in the microwave. This will loosen up any food or grime to be wiped away later. 2) clean walls with 1/2 and 1/2 solution of W&V; 3) clean mini-blinds (yay! a solution!) with 1/2 and 1/2 W&V. Place on cloth and gently wipe away; 4) disinfect sponges and rags in water (cover the rags) and 1/4 c. vinegar; and 5) remove wallpaper by spraying (and even soaking) the wallpaper with 1/2 and 1/2 W&V solution. 
    2. With baking soda (V&BS): 1) cleaning sinks by mixing 1 cup of BS and then 1 cup hot vinegar. Let sit and then wash down drain. If you let it sit in your disposal a bit, this will deodorize as well! 2) cleaning the showerhead is fun with mixing 1/2 c BS and 1 c V into a plastic bag, tie it around the showerhead and let sit for a few minutes. 3) Mix 1 tsp BS and 1 Tbsp V and 1 c. water into a spray bottle and use as a freshener 4) Carpet stains can be removed by making a paste of 2 Tbsp of V and 1/4 c BS. Rub and let dry. Vacuum the next day. 
    3. With salt: mixing these two together to create a rub works great when trying to clean hard surfaces. 1) You can mix the two (1/4 c. vinegar and 1 tsp of salt) to scrub your oven, silver, copper, or other hard metal surfaces. 2) Remove soap buildup 1 part salt and 4 parts vinegar. 
    Remember to use 1/2 cup vinegar in your laundry. Not only does this help remove smells, but it works as a natural fabric softener. I always keep a bottle next to the laundry detergent. Make sure you DON'T mix vinegar and bleach. This can cause harmful fumes. Otherwise, add away! 

    Next week's topic: Cleaning with Citrus

    Sources used to compile my list: 
    1. http://www.cleaningwithvinegar.com/
    2. http://www.thenewhomemaker.com/vinegar
    3. http://www.vinegartips.com/Scripts/pageViewSec.asp?id=7
    4. Tara Norman: http://organizedsahm.wordpress.com/
    5. Parade Magazine's article: "Vinegar Can be Used for WHAT?" (August 7, 2011) ...This article talked more about how to use it for health reasons, but it gave me some ideas to research. 

    Tuesday, August 23, 2011

    Tuesday's Food: Crockpot French Toast

    So, my friend, Tara, over at MommyTime, and I have been trying out recipes from Stephanie O'Dea's blog, A Year of Slow Cooking. We decided since we both love our slow cookers, and we are blogging about it anyway, we were going to take on the joint effort of going through Stephanie's recipes, trying them on our families, and then blogging about it. Go on over to MommyTime and check out her schedule (she's a much better planner than I) and then come here on Tuesdays to see what I've done.


    Today's recipe is a French Toast one that can cook overnight or made in time for Brinner that evening. I am in love with French Toast. It's not very good for me, so I'm always trying to find alternative, healthier version of this awesome, yummy breakfast. I adjusted the recipe I found here for various reasons, but I'll explain that as I go.

    Ingredients:

    --1 whole loaf of bread (I used 1/2 of a loaf of homemade cinnamon raisin bread I made a while a go)
    --1 dozen eggs (I used 10 eggs and a cup of applesauce instead). 
    --2 t vanilla
    --4 cups of milk (I used 3 cups)
    --1/4 t salt
    --2 t cinnamon
    --1/4 cup brown sugar
    --1/4 cup walnuts, or other desired nuts (optional. I did not use nuts this time.)
    AND...I used nutmeg. I always use a dash of nutmeg with my French Toast. So yummy! 

    Directions: 
    It is recommended to use a large (6 quart) crockpot, but since mine was already in use for dinner, I used my 3 quart. Therefore, I used only half of my raisin bread. I recommend using enough bread to come just below the top of the bowl. The bread will expand. 
    Grease the inside of your crockpot very well with butter, shortening, or cooking spray. Slice your bread into large slices (if it's already sliced, just dump it in) and place the bread into the crockpot. 


    (isn't that just pretty bread?) 
    In a large bowl, whisk the eggs, milk, applesauce, brown sugar, salt, cinnamon, nutmeg and vanilla together. Pour on top of the bread. 


    Cover and cook on low for 6-8 hours. This is done when the bread has soaked up all of the liquid and the egg has cooked (you can tell because you'll see bits of cooked egg stuck to the bread). I waited until about 10 pm the night before, since we get up at 6, and my smaller crockpot does not have a warming button or turns off when it's done. 

    Okay...here we go...
     

    As Stephanie suggested, when I got up, I took the lid off the crockpot to let any extra liquid evaporate. Worked GREAT! It gave me time to make the coffee, set out the plates and cups for the kids, and do a little devotion before they were ready to eat. 

    This is what it looked like when I came into the kitchen at 6 am. 

    I served it warm on the plate with a little powdered sugar. We don't really use a lot of syrup, and it was already a little sweet. My boys loved it, and were excited we had enough left over for tomorrow's breakfast (YES! I can sleep an extra 10 more minutes!). It didn't taste exactly like french toast. It did, though, taste like many of the other baked french toasts and overnight french toasts I have had before. It did also taste like bread pudding, which I seriously love (served at the local BBQ place), but only eat in small amounts. I would totally recommend this and have been told to make it again, because, well, in the words of my sons, I am "the best mom EVER for making such good breakfasts"! :) 


    Monday's Devotion: Wheat and Weeds

    " And no wonder! Satan does it all the time, dressing up as a beautiful angel of light. So it shouldn't surprise us when his servants masquerade as servants of God. But they're not getting by with anything. They'll pay for it in the end." 2 Corinthians 11:14-15


    A few weekends ago, I was at my in-law's place waaaay out in the country. Driving with my mother-in-law down her long driveway, she pointed out a beautiful lily growing all by itself in the middle of a weedy field. When I asked her about it's weird placement, she pointed to the other side of the driveway towards the ditch. Everything was brown, ugly, and dead. She said, "There used to be so many pretty flowers and lilies on this side of the road, too, but when we sprayed to kill the weeds, it killed all the flowers too." The contrast of both sides of the road was so stunning, and even more so when I began studying the parable of the wheat and weeds for this past Sunday's lesson. 


    In Matthew 13: 24-30; 36-43, Jesus tells the parable of the Wheat and the Weeds and then explains it in more detail to the disciples, later. A short summary of the parable: a farmer planted an entire crop of good seeds in a field. That night his enemy planted very similar looking weeds in the same field. When the workers noticed and asked if he wanted them to pull the weeds, he told them no. They would grow together until harvest time. He didn't want to risk pulling out the good with the bad. So when the harvest came, they pulled the weeds first and burned them. The good crop was then harvested. 


    Jesus explains there are two sowers: Jesus, who plants the good in the world, and Satan, who plants the bad. When the end of the world comes, all the bad will be sent to the fires of eternity, while the good will live strong in the glory of God. 


    2 Corinthians 11 explains how both exist in this world. Satan provides a perverted, but very appealing version of what God created as good. The weeds planted in the story look very similar to wheat, so there are times it is hard to tell the difference. Just as my children can't tell the difference between a weed and an actual flower, they pick them as presents anyway. So many people ask, "How can God allow the good to live with the bad?" Well, I believe it boils down to one thing: grace. God gives us grace to survive in a sinful world. Think about the examples in the Bible: Noah was spared over all the rest of the world. God could have easily wiped everyone off the face of the planet, but chose to extend grace to Noah, and in turn, mankind. How about Jonah? The city of Ninevah was BAD. Yup, by man's standards, they should have gone, but God provided grace for them, and they became better for it. And the list goes on. 


    Another quick point, the planter did not ask for the wheat to be uprooted and moved to another field completely. Not only did he not want to risk losing that crop, but he also decided to let them stay together. Are the good plants meant to influence the bad plants? 


    So after studying this example, the question remains: am I the wheat or am I the weed? Will I be able to grow strong in God's glory or be destroyed in the fires during the harvest? If I am a wheat, am I allow the weeds to influence me or am I influencing them? Am I gossiping? Am I thinking things that do not belong in my mind? Am I prideful? Am I selfish? Do I hate others? Am I just flat out not producing any fruit? There are so many weeds out there that look just as good as wheat, sometimes even better. How am I standing out as the right kind of plant? 


    Just like the lone lily in the field of weeds, I pray that I am growing strong and am a beautiful plant in the eyes of my Father.