Jana

Jana
Showing posts with label Bread. Show all posts

Saturday, April 13, 2013

Sausage, Egg, and Cheese Biscuits


Yummy Ready-To-Go Sausage, Egg, and Cheese Biscuits for those busy mornings. 
 There are just some mornings when getting up before the rest of the family to cook a well-balanced meal isn't exactly going to happen. And on Sunday mornings, when my family has to be leaving the house at 8am for church, many times I found myself tossing a granola bar to my kids as we sprint out the door. I made a "Spring-Time Resolution" not too long ago that I was going to be more proactive about having breakfast ready for the family that didn't involve them rummaging through the snack box for something to hold them over.

So when I saw a post on Pinterest about a great idea for egg biscuits, I smacked my forehead and realized I could make a delicious meal for my family ahead of time that would be easy to grab and go on those mornings I just can't be a perfect mom. {Quick note here, before writing this post, I tried to go back to the website I found to give credit for the idea. I couldn't find it. I then looked at Pinterest and found similar websites, but not the one that sparked the idea. So, just letting you know, this was not my brain child}.

The biggest problem I have had in the past with making egg biscuits is that the eggs are normally too big for the biscuits, and making scrambled eggs is really just out of the question. I have 3 kids. I'm not going to attempt that. The key to this entire recipe is to use mason jar lids. That's right, the lids. Once upon a time, I tried a biscuit cutter, but it just didn't work out. When I saw that lids might actually work, I was beyond excited. I have an entire shelf of mason jar lids, so I could really do an entire batch of biscuits all at once. So. Stinkin'. Excited. And it worked like a charm.

Here is what I did:
Step 1: I made some biscuits. I used my recipe for Homemade Biscuits Like Grandma Made. Instead of rolling them out 1/2 inch thick, I did 1/4 inch so I would have enough to have a top and bottom for each biscuit. 


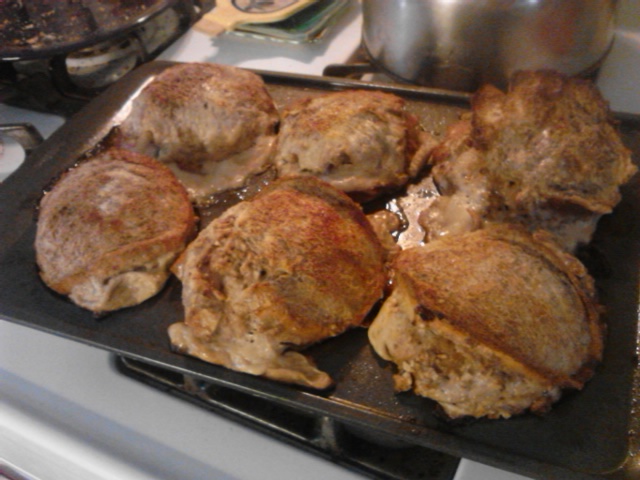
Step 2: I sprayed the inside of each lid with cooking spray {important} and placed it on a griddle on medium heat. Gently crack an egg into each lid. The lids where the egg is running out from underneath are the ones where I just cracked and dumped. After the eggs are in, add a small bit of butter, salt, and pepper. Let cook until the egg is almost completely settled. 

Step 3: When the egg has almost completely set, it's time to flip them. Very carefully, and with mittens on, if you don't have cumbersome ones like I do, remove the lids from the eggs, and gently flip. Now, if the lid does not remove easily, then you have some egg that has cooked to the bottom of the lid. There are TWO ways to solve this problem. 1. Take the back side of a spoon and gently try to push the edges of the egg off the lid. If that doesn't work, then 2. Flip the egg and lid over. Gently scrape the egg off the lid. Flip the egg and lid back over and remove lid. Then flip the egg so the other side can cook. All three methods were used on the eggs above.
Step 4: Once the eggs are cooked all the way through, remove from griddle and begin cooking your sausage. Try to make your sausage as round as possible, unless you are using those little sausages that are already formed into patties. Also, remember that the patties will shrink a little once cooked. Try to make your patties a little larger than the biscuit so when it's fully cooked, it will fit just right. 


Step 5: Assemble your biscuit. I used those little snack cheeses as our cheese, but you could most certainly use a slice of cheese here as well. If you use a slice, you may be able to split the slice in half and layer differently or use one slice of cheese for two biscuits. This is actually how I am leaving the biscuit until the morning. When we are ready for breakfast, I will heat up the biscuit, and the cheese will melt slightly at that time. 
Step 6: [Optional] If you made these ahead of time, wrap them in foil and place in a freezer zip bag. You can freeze these and pull out what you need when you need it. Or you can wrap them and put them in the fridge for the morning. When you reheat these {and melt the cheese in the process}, leave the foil ON and place in a toaster oven. 
                 

These sausage, egg, and cheese biscuits are not only delicious but also incredibly easy to make. I set aside an entire evening to make these, and really, it didn't take long at all. These would also make a great gifts to give to someone who just had a baby, who experienced a death in the family, or even for someone who has family in the hospital. Make a dozen, wrap and put in a freezer bag, and pass on to those you are trying to serve. Either way, families are going to be blessed and good food will be had by all. 

Happy eating, everyone.        


Thursday, March 14, 2013

Making My Own Coconut Flour

If you are looking for a low carb recipe or something for your Paleo diet, you are almost always going to run across the ingredients almond flour and coconut flour. At first, you look frantically everywhere thinking for sure grocery stores carry such items. Then you realize, not always, and if they do, it's normally really pricey. The only thing I found close to me was Bob's Red Mill Flour I can purchase at Big Lots or, if I have a sharp eye, at Publix or Bi-Lo. I decided, although it is nice to have a back up bag, I really should just make my own. 

This week I experimented with making my own coconut flour. The process itself is really not all that hard. It can be a bit time consuming,  but other than that, it's really easy. The hardest step I found was trying to find unsweetened coconut flakes, dried or not dried. I looked e-v-e-r-y-w-h-e-r-e, well, everywhere within a 30  mile radius. I'm sorry. I'm not driving 45 minutes to an hour away just to pick up a bag of unsweetened coconut. You can find sweetened coconut flakes everywhere. And you can still use it, but it adds carbs to your meals and unnecessary sugar that causes your body to crave more and more...and, yes, even more. I actually found some unsweetened coconut by accident. I was checking out prices on frozen berries at my favorite grocery store, Piggly Wiggly {"I'm Stickin' with The Pig"..."Local Since Forever"...yada yada}, when I saw small bags of unsweetened coconut, two bags for $3. I was so stinkin' excited!   So I figured it was a small enough amount that I could experiment on and NOT break the bank. And it worked out swimmingly. 

I made coconut flour two ways. Depending on what you have in your kitchen or what kind of time you are working on, you can make your own coconut flour for your meals. And as my daughter says, "Easy peasy, lemon squeezy". 

Homemade Coconut Flour

What's on the bottom is all but 1 cup of Bob's Red Mill Coconut Flour
that I paid around 10 BUCKS for. The top half is all but 1 cup
 of my homemade coconut flour that cost me only 3 to make. 

 Step 1: Drying the flakes 

Method 1: Dehydrator 

  1. Line your dehydrator with parchment paper. If your dehydrator doesn't have hundreds of little slats your coconut can fall through, then lucky you
  2. Spread out the coconut in as much of a single layer as possible. 
  3. Turn on your dehydrator and go about your day. 
This is a small batch and got me a little less than half a cup,
which is fine since most of the recipes I use are right around 1/2 cup of coconut flour. 


When I did this method, I did only one sheet, and it took about 8-10 hours for the flakes to dry. Honestly, if you are going to do it this way, I would prep it, turn it on, and go to bed. When you wake up in the morning, you can quickly grind the flour and make some pancakes or muffins or something delicious. 

Method 2: Cookie Sheet
  1. Turn your oven on LOW, between 170-200. I started mine at 170, but about an hour later, bumped it up to 200, and there it stayed until the end. 
  2. Spread the coconut in a single layer on a cookie sheet. 
  3. Bake for 2-3 hours. After the first 1 1/2 hours, I started checking every 15-20 minutes. You don't want to BAKE the coconut, you just want to dry it. And my experience with coconut is once it starts baking, it can cook FAST. 
This method is ideal if you are going to be home working around the house anyway. I worked in the yard, gardening, while my coconut was drying. I had the windows open so I could hear the timer go off every 20 minutes. It forced me to come inside, check the coconut, and drink some water before heading back outside. 


Step 2: Grinding the Dried Coconut

Now that your unsweetened coconut is dried, the rest of the process takes only about 2 minutes. 

  1. Dump your dried coconut into your blender, Vitamix {if you are lucky enough to have one...which makes me super duper jealous}, or your Magic Bullet
  2. Pulse the coconut. I pulse and then shook the container, then pulsed again. Coconut has oils in it that can cause all your hard work to clump together. So I just shake it a little between pulses to make sure everything stays separated. 
  3. Keep blending until the coconut flakes become a fine powder and then STOP. If you keep going, you can make coconut butter, which I'm sure is delicious, and something I plan on trying next time, but it's not going to help you make your pancakes. 

That's it! Just dry and grind. "Easy Peasy Lemon Squeezy!" 

I have kicked around the idea of purchasing some dried unsweetened coconut flakes in bulk online. I can use the coconut flakes, not ground up as a flour, to make all kinds of things, such as these Coconut Nested Eggs {see picture below}. I'm just not sure if it will save me money or if it all comes out the same. 

This is really just 1 egg, 1/4 cup of unsweetened dried coconut flakes,
and about 15 minutes of your time. I love, love, love this recipe.
 I made 12 in my large muffin tin. Each family member got two with a slice of bacon,
and the kids fought over who was going to get an additional egg. Win-Win.  


And if you are looking for a recipe using coconut flour, here's one I made this morning for breakfast: Lemon Coconut Flour Pancakes

I didn't have any lemon extract, so these were more "Cinnamon Coconut Flour Pancakes", but after making the batter I realized I could have used lemon zest. So next time....

I served these pancakes with frozen berries, a little LOCAL bee pollen,
and some powdered sugar. On my pancakes, I omitted the powdered sugar
and added about a Tablespoon of homemade whipped cream. Super yummy. 

Wednesday, November 28, 2012

Recipe: Homemade Crescent Rolls


'Tis the Season for baking, and a cook's best friend this time of year can easily be a can of Pillsbury Crescent Rolls {see this link for recipe ideas...and no, they do not pay me for suggesting them}. Since I've gotten pretty handy at making most of my own bread products, and since my husband loves a good crescent roll, I figured I would give that flaky, buttery bread a shot.

So...on to Pinterest. I found a recipe that liked the finished product, but the process was NOT fun. NONE of my dough was looking anything like the pictures. AND I was practically dropping globs of dough onto my stone and hoping they came out right. And they did taste yummy, but it was not a recipe I was going to pass on...yet. {I'll be posting the original recipe link below in a minute in hopes that one of my cooking friends will try it and maybe tell me what I did wrong}.
I then adjusted the recipe. The second batch was much easier to work with. I added another cup of flour to the original recipe, changed when I added the ingredients, and floured my surface A LOT more, and ended up with some yummy biscuits. That's right, I said biscuits. They were good, but were not flaky like those crescent rolls I love so much.

And then I adjusted the recipe again. This is the recipe I'll be sharing with you. These were still messy. They weren't as flaky as the first batch, but not biscuits. I almost overcooked them as well because they were just so fluffy when I pulled them out, that I thought they weren't done on the inside.So after three tries, I'm going to give  you my best effort. Enjoy...and I got the original recipe from The Big Red Pot.

Homemade Crescent Rolls
Ingredients: 

  • 2 1/4 tsp yeast
  • 1/2 cup warm water
  • 1 Tbsp, plus 1 tsp sugar
  • 3 1/2 cups flour, divided
  • 1/2 tsp salt
  • 4 Tbsp salted butter, room temperature
  • 1 Tbsp butter, frozen
  • 1 Tbsp butter, melted 
Directions
  1. In a large mixing bowl, dissolve yeast and sugar in the warm water. Let sit for 5 minutes until foamy. 
  2. Add 2 1/2 cups flour, salt, and room temperature butter. Mix on low speed, until well blended. Cover with a clean towel, and let sit for 45 minutes. 
  3. YOU ARE GOING TO NEED AT LEAST THE REST OF THE FLOUR FOR THE NEXT STEP. Be prepared for a mess. 
  4. After 45 minutes, pour the dough onto a WELL-FLOURED surface. Make sure your hands and any utensils you use have flour on them as well. The dough is super sticky. Roll into a large circle {the recommended size in the original recipe was a circle with a 12 inch diameter. This was too thick for me}. Using a floured pizza roller, cut your triangles {again, the recommended number was 12, but I'm pretty sure all of mine yielded more than that}. 
  5. GRATE your frozen butter over the triangles. 
  6. Roll the crescents, starting at the large base {opposite of the point of the triangle}. I used a very flat floured spatula to help me flip the dough over and over until I reached the tip of the triangle. This seemed to work best. Place the rolls onto a stone or a well-oiled baking sheet. Cover with a clean towel. 
  7. Keep the rolls covered while heating the oven to 400 degrees. 
  8. Uncover the rolls and bake for 18 minutes. 
  9. When they remove, brush with melted butter. 
Here's my beautiful daughter helping me out. 

SO MESSY. See how the well-floured ones turned out like crescents [top] and some were more globs [bottom]?
And my fingers were well covered and super sticky. NOT fun. 

This was my counter afterwards. SO much flour. 

This was the first batch. I stuffed them with leftover ham from Thanksgiving and some cheese. YUM


So you see here that once you figure out how to make them, you can go crazy with what you put in them. I made one batch that I filled with cinnamon sugar and served for breakfast with a powdered sugar icing. The kids loved them. 

Give them a try and let me know what you think. 

Thursday, October 25, 2012

100 Calorie Brownie with Coconut Whipped Topping {a review}

Chocolate....mmm....comfort food for my woman's soul. As much as I love chocolate, I know that more than just a piece of dark chocolate a day is not necessarily going to help me lose/maintain my weight. But because I have such a sweet tooth, and I'm normally craving chocolate like it's my life support, I have been trying to find acceptable, healthier options that meet my sweet tooth craving, but won't sabotage my efforts to live a healthier life.

My secret to success? Coconut. Yeah, yeah. I know I'm pretty sure I jumped on this band wagon, but experimenting with coconut the past few weeks has been interesting. I started adding coconut water to my smoothies. I bought up a bunch of cans of coconut milk at Big Lots and have been using the milk in my coffee, oatmeal, and other desserts. Here's the kicker: I don't really like coconut. Well, "imitation" coconut. It always smells like suntan lotion, and it's normally a turn off for me. I do know, though, that I'm coming to like this stuff, adding it here and there. Check the links below for other recipes where coconut is a factor. 

NOW back to chocolate {and really the reason why so many of you are reading this}. 

I found a recipe for 200 Calorie Hot Fudge Brownie Sundae on Pinterest {as I was looking for a way to make coconut whipped topping}, and since it was one of my favorite librarian's birthday, what better way to celebrate than to make brownies that won't make you feel like you have to hit the treadmill for 2 hours? 

We didn't make the hot fudge, the banana soft serve ice cream, or add the cherries, but check the link above for all those recipes. 

Here's the recipe for the brownie and the whipped topping: 

The brownie was in the shape of a rose. I have this nifty muffin tin from Williams-Sonoma...but I don't think they sell them anymore. :{ 
100 Calorie Brownie with Coconut Whipped Topping {all credit is due to Back to Her Roots}

Ingredients: 

Brownie: 
  • 1/4 cup unsweetened apple sauce {I made my own since I didn't have any at the house}
  • 1 tsp vanilla extract
  • 1/2 cup egg whites {about 4}
  • 1/3 cup whole wheat flour
  • 1/2 cup unsweetened cocoa powder
  • pinch of salt
  • 2/3 cups sugar
Whipped Topping: 
  • *1 can whipped topping, not lite {see NOTE below}
  • 1/4 cup confectioner's sugar 
Directions: 

Brownie: 
  1. Preheat oven to 350. Spray muffin tin with cooking spray. 
  2. In a medium sized mixing bowl, whisk together applesauce, vanilla, and egg whites until well combined. 
  3. Add flour, cocoa, salt, and sugar until just combined. 
  4. Pour in muffin tin and bake for 10-12 minutes. Let cool for 15-20 minutes. 
Whipped Topping: 
  1. Carefully open the cold can of coconut milk {say that 3x fast} without shaking or stirring. Spoon out the top white portion, leaving the coconut water on the bottom. 
  2. Whip coconut cream on high in an electric mixer until stiff peaks form, about 10 minutes
  3. Add in confectioner's sugar and mix for another 2 minutes. 
Assembly: {Uh...duh? But I'll add this anyway}

Once the muffins have cooled, add the coconut whipped topping on top. Eat. Each brownie is roughly 100 calories. 

NOTE: 
The recipe called for a closed can of cold coconut milk which you open when you are ready to mix. After trying out a few "whipped coconut" recipes, I have found the best way to utilize this is to gently open the can of coconut milk the night before and then place in the fridge. For some reason, this helps solidify the milk faster. The can I used for this recipe didn't have the milk and water separate, but I whipped it up anyway. I had to add a little more powdered sugar to thicken the topping enough that it would actually stay on the brownie. 

Other "Coconut" recipes I have tried: 
  1. Chocolate Frosting Shots
  2. Make Ahead Oatmeal Smoothies
  3. Overnight Refrigerator Oatmeal {I must say I have made this with and without coconut milk. The coconut milk made this SUPER thick, and I'm not sure I really like it too much.}
  4. Crockpot Pumpkin Oatmeal {I had to actually add a little more honey to it, and then it tasted like pumpkin pie oatmeal. These were super thick and froze well for smaller individual servings}
  5. Muffin Tin Smoothies
  6. Avocado Chocolate Pudding

Thursday, October 18, 2012

Books and Banana Bread


Do I have a special for you today. I stumbled across a book series that I absolutely love on my weekly trip to the library. Lately, I have steered away from the romance novels that are more about the "canoodling" and less about developing relationships. Lucky for me, my local library makes "good, clean" love stories easy to find, with a special sticker on the side. So when I picked up Sweet Caroline, a Lowcountry novel, by Rachel Hauck, I was immediately wrapped up in this world based out of one of my favorite places to visit, Beaufort, SC. I quickly ran back to the library and picked up the rest of the series, Love Starts with Elle and Dining with Joy.


All three of these ladies, Caroline, Elle, and Joy, are pushed into a situation where they suddenly have to discover who they are, what their purposes are. Caroline, a people-pleaser, was unexpectantly given ownership of a failing restaurant and has to decide whether to keep it or to drop it and go to Barcelona for an incredible job opportunity. Elle, a free spirit, closes her art gallery with the expectation of moving away to marry the man of her dreams, only to be faced with no man, no job, and no gallery. Joy, the humorous and the local tv show cooking host, can't cook. Now that her show has been moved to a prime time national spot, her secret of not being able to cook is threatened, and she could chance losing everything. 

Each of these ladies not only struggle with discovering their purpose, but they are each faced with unexpectantly developing a relationship with a man...and more importantly, they are faced with their relationship with their Creator. 

These stories were quirky, good stories where I had to put a bookmark at the end of the chapter so I wouldn't keep reading. I was completely engrossed in their lives and the outcomes weren't always 100 percent predictable. 

This is a good beach read or a great coffee, blanket, fireplace read. And I recommend both. 

And now, for a recipe. 

At the end of Dining with Joy, I found a wonderful surprise: a recipe for Banana Bread. Throughout the novel, Joy was constantly reminded of her father's infamous Banana Bread, something he made on a regular basis and was the source of so many memories. I was pleased to find the recipe at the end of the book. I didn't have all of the ingredients, but I sure did have most of it. I tried it, and it was GOOD. So I'm going to share my variation here for you. 

Almost Dining with Joy Banana Bread Muffins Original Recipe Found On Rachel Hauck's site here
Ingredients: 

  • 1 cup all purpose flour
  • 3/4 cup whole wheat flour
  • 1 cup Turbinado sugar
  • 1/2 cup brown sugar
  • 1 tsp baking soda
  • 1/2 tsp salt
  • 1 tsp cinnamon
  • 2 eggs
  • 3 ripe, mashed bananas 
  • 1/2 cup oil
  • 1/4 cup milk, plus 1 Tbsp white vinegar, mixed
  • 1 1/2 tsp vanilla
  • 1/2 cup chocolate chips
  • 1/4 cup peanut butter
Directions: 
  1. Preheat oven to 325. 
  2. In a large bowl mix flours, sugars, baking soda, salt, and cinnamon. 
  3. In another bowl, mix eggs, bananas, oil, milk mixture, and vanilla. 
  4. Add the wet to the dry mixture and blend. 
  5. Slowly stir in chocolate chips and peanut butter
  6. Pour into a greased muffin tin. 
  7. Bake for 40 minutes. 
This is slightly different, but came out great. And it's a good thing I was paying attention to the muffins. The original recipe, which is for bread not muffins, had you cooking for twice as long. I almost went outside for an hour on my hammock while I waited for it to be finished. Thank goodness that didn't happen. :} 


So whip up a batch of "Almost Dining with Joy Banana Bread Muffins", and curl up with one {or all} of these three books. You won't regret it. 

Friday, October 5, 2012

Crockpot Cinnamon Roll Pancakes

Look at my attempt at food art...and don't tell me you don't have one of those delicious bottles of syrup. 

The first time I saw that one could make pancakes in a crockpot, I about flipped. What? No way. But Stephanie, from A Year of Slow Cooking, posted a recipe for Crockpot Pancakes. And it's a winner in our house.

Now, let me get this straight, first. It doesn't come out like flat circles. It's more of a scone-like dish. The reason why we call it "pancakes" is because you use pancake mix to make it. Also, this recipe can take anywhere from 2 1/2 hours to make or as long as 6 hours. So it's a good recipe to start right after school for brinner, or you can have it on while you are at work. The longer it is in, though, the more scone-like it is. So now that you've been warned, let's get to today's recipe.

Crockpot Cinnamon Roll Pancakes
 Ingredients: note: the first 9 ingredients is a double amount of My Go-To Pancakes

  • 2 cups all purpose flour
  • 1 1/2 cups whole wheat flour {you can use just all purpose if you want, but I like to add wheat to my breads as much as possible} 
  • 7 tsp {or 2 1/3 Tbsp} baking powder
  • 2 tsp salt
  • 2 Tbsp sugar
  • 2 1/2 cups milk
  • 2 eggs
  • 6 Tbsp butter, melted
  • 4 tsp vanilla 
  • 1/2 cup brown sugar
  • 2 Tbsp cinnamon 
Directions: 

1. In a large bowl, mix together the flour, baking powder, salt, and sugar.
2. In a small bowl, whisk together the milk, eggs, melted butter, and vanilla.
3. Combine the mixed dry and mixed wet ingredients.
4. In another small bowl, mix together the brown sugar and cinnamon. 
Pancake mix on the left, brown sugar and cinnamon mix on the right. 
5. Spray your crockpot with cooking spray. DO THIS. 
6.  Pour about 1/3 of your pancake batter into your crock. 
7. Sprinkle about half of the cinnamon/sugar mixture on top. 

8. Repeat once, but leave about 1 Tbsp of the cinnamon/sugar mixture. 
9. For the last step, add the rest of the pancake batter and then sprinkle the last Tbsp of cinnamon/sugar on top. 
10. Cover and cook on HIGH for 2-3 hours or on LOW for 6 hours. Just make sure that you stick a knife in it to make sure it's done in the middle. 

When it is time to serve, each piece should have a few layers of pancake mix and gooey cinnamon/sugar. It almost tastes like those friendship breads people always have going around at Christmas. Check out the layers in the pic below: 


I'm telling you, my sons were all "mmmm"ing and "Oh man"ing while eating this. And we actually had enough to serve for breakfast the next morning. JUST AS GOOD. 

You MUST try this. Super easy, and super yummy. 

Thursday, September 20, 2012

Food: Crockpot Chicken Noodle Soup

You are in for a 2.5-er today! I am going to post one MAIN recipe, but in doing that, I'm going to have to give you a few more. So bonus for you!

My oldest son had been begging for chicken noodle soup for weeks. Not only did the weather not necessarily call for soup, but I hadn't roasted a chicken yet to make the soup. So when it started getting cooler, I decided it was time for some soup. 

First thing's first, I needed to roast a chicken. Nothing is better than getting a whole chicken from the store and making a few meals out of it. And that's exactly what I did. Here's my recipe for....


Crockpot Chicken Roast

Ingredients
  • Small whole chicken, washed, insides removed, and patted dry
  • Chicken Roast Rub {scroll to the bottom of my Chicken Pot Pie recipe for the rub ingredients}
  • 2 Tbsp of butter 
  • Water
  • Optional: 2-3 carrots, diced; 2 celery stalks, chopped; 1 medium onion, chopped
Directions
  1. Spray your crockpot with cooking spray. 
  2. Soften the butter, but do not melt. Mix in about a Tbsp or so of the Chicken Roast Rub. 
  3. With your hands, rub down the chicken with the herbed butter mixture, making sure you get between the skin and the meat and the inside of the chicken. 
  4. At this point, you can stuff the inside of the chicken with the carrots, celery, and onion, if you would like, and if you want to add more of the Chicken Roast Rub, it's up to you. I normally do, but we really like an "herby" chicken in my house. 
  5. NOW, there are two methods you can use in the crockpot: 
    1. Ball up foil into 2 or 3 inch balls and place on the bottom of the crockpot. Place the chicken on top, cover, and cook on LOW for 6-8 hours or on HIGH for 4-6, or until the chicken is done. {This method makes the chicken more of a "rotisserie" chicken}...OR...
    2. Place chicken on the bottom of the crockpot, cover, and cook on LOW for 6-8 hours or on HIGH for 4-6, or until the chicken is done. 
    3. WITH BOTH, you can {again, this is optional} take the lid off at the end of your cooking time, and place the chicken, still in the crock, under a broiler until the skin begins to get crispy. 
    4. DO NOT THROW OUT THE CHICKEN JUICES COLLECTED AT THE BOTTOM OF THE CROCKPOT. This makes incredible chicken broth, and you will need it for soups. 
So... you eat a delicious meal, but you have quite a bit of chicken leftover? Pull it all from the bones and set aside for later. BUT put those bones back in the crockpot, cover with water, and let cook ON LOW for 8-12 hours {generally overnight}. You are going to have a TON of broth. Freeze for later, or you can use it to make Chicken Noodle Soup. 

Here it is, the recipe of the hour....


Chicken Noodle Soup
Ingredients
  • At least 2 cups of chicken meat
  • 4-5 medium carrots, sliced
  • 2 celery stalks, chopped
  • 1 medium onion, chopped
  • 2 Tbsp Chicken Roast Rub
  • 1 Tbsp Salt
  • 2 tsp black pepper
  • Chicken broth, enough to fill the crock {use the broth you made, either with the roast or with the leftover bones...or BOTH}
  • 1/2 pound of noodles {I wouldn't recommend wheat noodles. Everytime I tried it, they turned out mushy}
Directions: 
  1. Put all ingredients, except the noodles, in the crockpot. Make sure the broth goes pretty much to the top of the crockpot. 
  2. Cook on LOW for 6-8 hours or on HIGH for 4-6 hours.
  3. About an hour before you are ready, taste the soup. Add more salt or pepper, if needed. 
  4. About 30 before serving, add the noodles. This may take the broth to the TOP of the crockpot, but the noodles will absorb some of the liquid. 
  5. ....meanwhile, make some Made from "Scratch" Corn Bread Muffins and brew some fresh sweet tea. 
  6. The soup is done when the noodles are ready. 
And that's it! It's amazing what you can do with one small, whole chicken, but making soup is definitely top of my list when the weather is cooler. I hope you try this and enjoy! :o} 

Friday, September 14, 2012

Food: 1 Hour Bread Recipe in 4 Ways

One of my friends who knows I make a lot of bread sent me a link about a year ago about a loaf of bread you can make in 1 hour. So the other day I was looking for that recipe and couldn't find it, so on to Pinterest I went. I thought for sure I saved it to one of my boards, but, alas, I couldn't find it. But what I did find, though, was another recipe for 1 hour bread that makes TWO LARGE loaves in an hour and requires only a few ingredients. Not only did I love, love, love this new recipe, but I tried a few variations of it, and they all turned out great. It's all I can do to keep this bread in my house. Lucky for me, and now for you, these recipes are available for you, and you can have fresh bread ready before dinner is finished tonight.

Here's the basic recipe that I found on La Fuji Mama [link for original recipe here]. I adjusted it slightly only because she called for specific stuff, and even gives reasons why you should use those ingredients, but I found that my variations were just fine.

1 Hour Bread...or as we call it in our house Jed Bread [since he helps me make it]
Ingredients: 
5 1/4 cup all purpose flour
4 Tbsp Turbinado [or white, if you want] sugar
1 1/2 tsp salt
1 1/2 Tbsp yeast [I use the rapid rising yeast that comes in a jar]
1 1/2 Tbsp olive oil
2 cups hot water

Directions:

  1. Mix together the dry ingredients. Slowly add the oil and water until well combined. 
  2. Spray the counter with cooking spray and knead the bread until smooth. 
  3. Split the dough in half and form into loaves. 
  4. Place on a baking sheet or stone, cover with a clean, dry towel, and let rise for 25 minutes. 
  5. While the bread is rising, preheat the oven to 350 degrees. 
  6. After 25 minutes, put the bread in the oven and bake for 25 minutes. 
  7. When it comes out, I always take about a Tbsp of melted butter and brush the top. Let cool before slicing. 
Oh yeah. We are some bread loving fools here. 
NOTE: I generally do steps 1 and 2 in the mixer. Using a dough hook, I mix the ingredients on low speed. Once they are all combined, I turn it up to about medium speed for about 3 minutes until smooth. I kind of test it by how "clean" my bowl looks. All the dough should form a ball and pull away from the sides of the bowl. 

So it's THAT EASY. I did those four loaves in the above picture in a TOTAL of an hour and a half. I gave one to the new neighbors, we ate one for dinner and breakfast, I served one at home group, and the other was put into the freezer for another day. Not bad for under two hours of work. 

Then I thought, "I wonder if it would still work and taste good if I changed the ingredients." And they do. I tried changing it up 3 different ways. 

Variation 1: Honey Wheat Bread
Ingredients
3 cups wheat flour
2.5 cups all purpose flour
4 Tbsp local, raw honey 
1.5 tsp salt
1.5 Tbsp yeast 
1.5 Tbsp olive oil
2 cups HOT water

Directions: [pretty much the same as above]
  1. Mix the dry ingredients in the mixing bowl. In a smaller bowl, mix together the wet ingredients [I like how this helps melt the honey and spread out the honey]
  2. Continue the rest of the directions as in the original. 
  3. To add a little extra honey taste, when I melt the butter to brush on top, I add about a Tbsp of honey to the melted butter and brush on top. 
Variation 2: Braided Loaf

So, I'm not going to give the ingredients because it's all the same [of either variation above]. 

As for directions, before letting the bread sit to rise, separate each loaf into 3 parts. Roll into long ropes. Pinch the ends of the ropes and then braid. Then pinch the other end of the ropes. Tuck both ends under, cover, and let rise. 
This bread would be super pretty for the holidays or for a shower. 

Variation 3: Cinnamon Roll Bread [both my husband and my oldest son...and most honest critic...said it tastes just like the kind you get at the restaurants...so it is most definitely a hit in my house, and they never last more than a day]

Ingredients
Same 6 ingredients in the original recipe, plus....
3 Tbsp butter, melted
1/3 cup brown sugar
2 Tbsp ground cinnamon 

Directions: 
  1. Follow original steps 1-3. 
  2. On a clean surface, lightly sprayed with cooking oil, roll out one of the loaves into a 12 x 15 inch rectangle. 
  3. In a small bowl, combine the melted butter, brown sugar, and cinnamon. It should be kind of a paste. If it's not, you can add more brown sugar or more cinnamon. I tend to add more cinnamon because the sugar will melt, and we REALLY like cinnamon. 
  4. Spread the cinnamon/sugar mixture over the entire rolled out dough, leaving about a 1/8 inch on all the edges. 
  5. Tightly roll the dough into a tube. Pinch all the edges closed. The first time I made this, I didn't do this, and the melted butter came out in every opening, making a mess of my oven. 
  6. Set on a baking sheet or stone, cover, let rise, and then follow the rest of the directions. 
This is something GOOD. The only thing I would say is that it doesn't rise as much as the other bread and is a little more delicate. It's still so stinkin' good, though. 

See all that goop coming out? That was because I didn't seal the edges. 


If you are interested in some more breads I have done, check out these links below: 
I have created a "Bread" label as well that includes many of the other breads I have made and shared. 

Happy Baking, everyone. 

Tuesday, July 31, 2012

Food: Waffled Crepes with Tropical Sauce

Last night for Meatless Monday I made some of my Waffled Falafels. And since my waffle iron was already out this morning, I decided to check out The Waffleizer website to see what kind of breakfast ideas could be found. Lo and Behold! I found a recipe for crepes. I have not made crepes since my French class in college (where I was dubbed the best crepe maker in the class!!) They were incredibly easy to make, but I was afraid to try them again without my French professor making sure I had the right technique. But when I saw the recipe for Waffled Crepe Batter, I figured it wouldn't hurt trying out crepes in my waffle iron. I tweaked the recipe just a tad to make it a little healthier, and I added a "tropical sauce" for the top. I think if you were to try these, you would be pleasantly surprised.


Waffled Crepes with Tropical Sauce
Ingredients: 

For the crepes: 
  • 4 eggs 
  • 1 cup 1% (or less) milk
  • 1/2 tsp salt
  • 1 tsp Turbinado sugar
  • 3/4 cup whole wheat flour
  • 1/4 cup all purpose flour 
So notice I have regular white sugar here in the picture? Yeah, I quickly changed it to Turbinado sugar. And look at the flour in the small measuring cup. See the wheat on the bottom and the all purpose on top? Yup, That's how I roll! 

For the sauce: 
  • 2 cups of frozen tropical fruit (pineapples, mangos, peaches, and strawberries) 
  • 1 tsp vanilla 


Directions: 

For the crepes: 
  1. In a medium bowl, whisk the eggs and milk together. 
  2. Add salt, sugar, and flour and whisk until smooth (the original recipe said until slightly lumpy, but I got a little carried away, and made my smooth, and it worked just fine) 
  3. Set aside for 30 minutes 
Take this time to get your waffle iron ready and your tropical sauce prepared. 

For the sauce: 
  1. Put the fruit into a blender. Let it sit for about 5 minutes to defrost just a little. You don't want to burn  your motor out trying to blend rock hard fruit. 
  2. Pulse until the fruit is pretty much chopped up. 
  3. Add the vanilla to the fruit and blend until creamy or slightly lumpy. 
To Make the Crepes: 
  1. Pour the batter in the waffle iron. I filled mine just enough to cover the little squares. Because it is eggs, it's going to expand. You don't want it too big. PLUS, crepes are meant to be kind of thin and light. 
  2. Close the lid and watch the steam. When the steam is starting to slow down, check your crepes. If they are golden brown, take them out. 
  3. Add a spoonful (that's an official measurement) on top of each waffled crepe. 
  4. OPTIONAL: add a slight dusting of powdered sugar on top. 

These little beauties are filling. I gave my kids two squares each, and they were full. I really, really love the tropical sauce (which I think is basically fruit sorbet, but I'll have to do research on that). Try these and let me know what you think! 

Wednesday, June 6, 2012

Made From "Scratch" Corn Bread Muffins

I'm a Jiffy Cornbread type of girl. I always have been. I like a cornbread that is sweet and buttery, and Jiffy normally does it for me. But last night as I was fixing dinner (Chicken Enchilada soup from Fresh Finds...and I can only "Find" them at Big Lots...so GOOD...and inexpensive, you MUST give their soups a try!!), and I knew that I needed some bread to go with the soup. My husband is a big bread eater. He was raised to have some sort of bread at every meal. So if I don't fix it, he goes through the bread bin (well, ziplock bag on the counter) and grabs any kind he can get his hands on. Since I was making a Chicken Enchilada soup that I was adding Rice and Bean chips, sour cream, and cheese to, I felt that corn bread would be a great companion...and it was! Since I had corn meal already from making things like English Muffins, I knew making cornbread from scratch was going to be the order of the day! So here's my recipe:

Made From "Scratch" Corn Bread Muffins

Ingredients:

  • 1 cup corn meal
  • 1 cup all purpose flour
  • 1/4 cup turbinado sugar (you can use regular white sugar, but I really love the "molasses" taste of the turbinado 
  • 1 Tbsp baking powder
  • 1 tsp salt
  • 1 cup milk
  • 1/3 cup vegetable oil
  • 1 egg
  • 2 Tbsp honey
  •  2 Tbsp butter, melted
Directions
  1. Preheat oven to 400 degrees. 
  2. Mix the dry ingredients together in a small bowl, and the wet ingredients (except the melted butter) in a large bowl. Once those two are well blended, combine them in the large bowl and mix well. (TIP: this is where I would also sometimes add garlic powder and/or shredded cheddar cheese as well, but I wanted them "plain" last night). Let the batter sit for about 3-5 minutes. 
  3. While the batter is sitting, prepare your muffin tins. Either spray with a cooking spray or line with cupcake wrappers. 
  4. Fill each cupcake wrapper about 3/4 full. This recipe will make 12 regular size muffins (or 6 LARGE muffins or 24 mini-muffins...whatever floats your boat). 
  5. Bake for 25 minutes. 
  6. Right after you pull the muffins out, brush the tops of the muffins with a little bit of the melted butter. 
That's pretty much it. It's not that much harder than dumping a box (or two) of Jiffy mix in a bowl and adding an egg and milk. But I really love that I'm finding uses for that corn meal that I have sitting in a large mason jar in my pantry. My family loved the muffins, and I was pleasantly surprised by how good they were! 

Don't tell me this doesn't make you want to whip up a batch of White Bean and Apple Chili! Yummy! 

Monday, June 4, 2012

French Toast Lasagna

This morning I took a look at our sad, sad little list of meats we had left in the freezer and all the possible meals I could make from it. I do a major meat shopping trip once a month, and then I post all the meats and meal ideas next to my weekly menu. That way if I'm just tired of chicken and don't want to dig through the freezer to see what else we have, I can just look at the list. This also gives my husband an idea just in case he gets the bright idea of cooking dinner one night. :) So anyway, I was looking at the list and was not feeling inspired by "hot dogs, chicken enchilada soup, pork chops, or tilapia". Then I spied on the counter a huge loaf of French bread I got off the clearance rack at Wal-Mart (only 96 cents!!!) and decided French Toast for dinner it is!

But I didn't want to do just any French Toast. I was in the mood to be a little creative. I have made little French Toast cups before (seen on Rachael Ray's show) and my own crockpot french toast. But I wanted something bigger than the RR FT cups, and I didn't plan far enough in advance for the crockpot FT. I decided I would utilize the LARGE cupcake pan and make some HUGE FT cups, but layer them with an apple-walnut mixture. Look at me! Being so "Next Food Network Star"ish! Below you will find the recipe and my family's reaction to this new dish! 


French Toast Lasagna

Ingredients
Yeah, so this is MOST of the ingredients. As I went along, I realized I needed a few extra items. See the list below. 
  • Large loaf of french bread
  • 8 eggs
  • 1 cup milk
  • 3 Tbsp butter, melted
  • 2 Tbsp plus 1 Tbsp ground cinnamon 
  • 1 tsp plus 1 tsp nutmeg 
  • 1 tsp vanilla 
  • 2 green apples, cored and diced 
  • 1/2 cup walnuts, finely chopped
  • 1/4 cup brown sugar
  • cooking spray
  • powdered sugar 
Directions
  1. Whisk together the eggs, milk, butter, 2 Tbsp cinnamon, 1 tsp nutmeg, and vanilla. Set aside. 
  2. Slice the French bread, at an angle, into 1/2 inch slices. You don't want it too thick, but not too thin either. You need to cut at least 2 slices per person. I cut 18 slices to make 6 large FT Lasagnas. 

3. Layer the French bread slices on a cookie sheet with a lip. Pour the egg mixture over the bread as evenly as possible. Set aside for about 10 minutes to let the bread soak up the egg mixture. Don't let it sit too long, otherwise you will have bread that is just not manageable. 

4. While that is soaking, preheat your oven to 400 degrees. 

5. Now on to the apple mixture, in a large bowl, combine diced apples, chopped walnuts, brown sugar, and the rest of the cinnamon and nutmeg. *See note below. 

6. Spray the muffin tin with cooking spray and then begin layering your FT. (NOTE: you ARE going to get your hands messy and some of the bread WILL be soggy and floppy. It's okay. It will turn out great.) Layering: place one slice of soaked bread on the bottom of the muffin cup, add a spoonful of the apple mixture, add another slice of bread. At this point, if you are using smaller muffin tins, this is where you will most likely stop. If you have large muffin tins, go ahead and make one more layer of apples and bread. It will end up looking like a little pie in your muffin pan. 

You could also sprinkle a little of cinnamon/sugar on top of the last piece of bread before you stick it in the oven, but it's not necessary. I'm doing it next time, though. :) 
I left the last one empty for the picture so you could see what it looks like with and without the apples. 
7. Once your oven is ready, place the muffin tin inside and set the timer for 30 minutes. WARNING: your house will smell wonderful!! Go ahead and make a pot of coffee, sit back with a good book, and wait until your little pieces of heaven are ready. 
BEFORE they were cooked. They look kind of gross here. Don't judge a  book by its cover! 
8. They are done with the bread is golden brown and firm to the touch. I never have a problem with the eggs not finishing cooking, so don't worry about that. 

9. Run a knife around the edge of the FT Lasagna and gently remove from the pan. Place on a plate and sprinkle with powered sugar. 
Fresh out of the oven! 

Now, I could have SWORN I took a pretty picture of my FT Lasagnas on a nice plate sprinkled with powdered sugar. But it's no where on my camera. So we scarfed ours down without a final picture. :( 

These turned out great! I fried up some red potatoes to go with them, and it was a meal fit for a king...or my hubby...and my two boys...and my picky eater daughter. 

*NOTE: the ONLY thing I would change about this would be to cut up about a cup of strawberries and mix them in with the apples and walnuts. It tastes just fine without them, but I think strawberries would add a little more color and just a little bit of flair to these French Toast Lasagnas. 
If you give these a shot, let me know what you think! These were quick, easy, and pretty inexpensive. AND it's a great meal to make for Meatless Monday or those nights you are craving Brinner! 

Enjoy and Happy Cooking!