Jana

Jana
Showing posts with label Crafting. Show all posts

Monday, June 3, 2013

Gifts to Buy or Make for a Male Teacher

My middle child is a spirited one. And as well as he did in kindergarten with two, lovely ladies, I felt that he needed a male teacher to reign him in. Lucky me, the only other male teacher left in the school was a 1st grade teacher. So I made petition to get No. 2 into that class, and HE MADE IT IN

No. 2 had a wonderful year with lots of growing and learning on all our parts. Then Christmas came along...and then Teacher Appreciation Week...and, finally, End of the Year. Those are all typical times students bring in gifts to their teachers showing them the love and appreciation they so much deserve. 


The problem is when you have a male teacher, getting a gift card to Target or buying a potted plant may not necessarily be something a male teacher would want. And not all male teachers are in to gardening or tools, either. 


So if you have been or are going to be in the same boat that I was in the past year, let me share a few things I did for No. 2's teacher this year. 


First thing, find out what the teacher likes

One thing I really love to do at the beginning of each year is have the teachers, male or female, fill out a little survey. I give this at the end of the first week with a "You Made It Through the First Week" care package {complete with sticky notes, pens, tissues, tylenol, glue sticks, tape, and a small gift card to Starbucks or Sonics}. I use this information all year long for ideas on gifts for the teachers. And, if I happen to have the emails or contact information of the other parents in the class, I share that information with them as well. 


This is one of my favorites to use for teachers. Find it HERE
For the male teacher, I actually gave him a longer list, since I was sure I was going to need more information to pull from through the year. Here are the questions I sent him. I used the survey above to get me started on this list. It's not in any cute format, but you get the gist. 


When is your birthday? 
Where do you like to get a quick lunch? 
What is your favorite restaurant? 
Where are your favorite shopping spots? 
What is your favorite soda? 
What is your favorite candy? 
What is your favorite color? 
What is your favorite place to get a gift card from? 
What is your favorite meal? 
What is your favorite Starbucks, DD, or hot drink? 
What is your favorite sport and team? 
What is your favorite music? 
Who is your favorite musician? 
What is your favorite scent?
Do you collect anything? 
Name one place you would like to visit. 
Breakfast, lunch, or dinner? 
What is your favorite type of book? 
Who is your favorite author? 
What are your hobbies? 
If you could choose 3 gifts at or under $25 each, what would they be?


Second, Share with Others and Enlist Help 

At this point, you should have a decent amount of information to choose from. I would recommend smaller gifts for holidays such as Christmas and Valentines, and larger gifts for Teacher Appreciation and End of the Year. For the larger gifts, join in with a couple of parents. OR, if you have access to all/most of the parents' emails in the class, share the list above and make a large gift basket {or bag or bucket or cooler} for your teacher. This does two things: 

1. Helps cut down the cost for YOU on getting a large gift for the teacher
2. Can make everyone in the class feel like they can contribute to a gift. 

As a former teacher, I know that there are so many students that can't afford to buy cute little gifts for the teachers. I normally ask if parents can send in 1.00 to go to a gift from the class. If you have 30 kids, you can get all kinds of things to fill up a bag for the teacher. 

Third, Choose When You Want to Give a Large/Small Gift 


During the school year, there are quite a few times when your child may want to bring a gift for his/her teacher. It is important for you to know ahead of time when you are going to give a gift. I like to check out the survey at the beginning of the year and start planning immediately so we can budget AND so I don't have duplicates. It can get expensive if you get a large gift for each event during the year. Here are some days you may want to give a gift to a teacher: 

1. The first day of school
2. Christmas
3. The 100th day of school
4.Valentine's Day
5. Teacher Appreciation Week
6. End of the Year

Gift Ideas for Male Teachers

Here are some of gifts I got for my son's teacher this year and some ideas that I picked up from other parents along the way: 

  1. Classroom Supplies
  2. Basic supplies for teacher-use only {sticky notes, bathroom passes, etc}
  3. Books, books, books {OR a gift card to a bookstore}. If your teacher sends home those Scholastic book order forms, see if your teacher is registered on the Scholastic website. You can actually buy books for teachers there as well. If he makes a wish list, you can actually purchase books, many times at a discounted rate, any time of the year. 
  4. Snacks. 
    1. Teachers need snacks through the day. For my son's teacher, I gave "manly" snacks, such as beef jerky or cans of nuts {check for allergies first}. 
    2. Many times teachers may have snacks for students who forget to bring snacks {if their class has one}. A teacher would definitely love if you got one of those LARGE containers of snacks for the class, such as animal crackers or pretzels. 
  5. "Handy" tools, such as flashlights or a small "fix it" box that has small screwdrivers in it. I actually used those in my classroom quite a bit...you would be surprised at what suddenly needs to be unscrewed or tightened up. 
  6. Gift cards
    1. Food
    2. Entertainment, such as movies
    3. Sports gift card. I got a NFL.com gift card one year for a male teacher who LOVES Green Bay. 
    4. Retail stores such as Outdoor stores {REI} or Sports stores {Dicks} 
    5. Education stores 
    6. Book stores 
  7. Meat Rubs. This is my most popular gift to get a guy, ANY guy, for ANY special events. Here's a great website to find some meat rubs. Get those really small {4 oz} mason jars, fill 3 or 4 of them, wrap some twine around them, and give those in a "rustic" looking bag or container. 
  8. "Themed" Gifts {these may depend on what your teacher likes...refer to the survey} These are GREAT GIFTS for the class to chip in together:
    1. Fishing Weekend: Small tackle box, tackle, fishing line
    2. Beach/Lake: Cooler, sunscreen, sodas, bug spray, and snacks 
    3. Movies: Fandango Gift Card, bags of kettle corn, sodas, a popcorn bowl 
    4. Ice Cream: Ice Cream bowls, ice cream scoop, sprinkles, hot fudge, and a gift card to Publix to get ice cream {thanks, Betsy, for such a great idea} 
  9. Coffee
    1. Gift Cards
    2. Coffee cups
    3. Coffee cup that is actually a single serving French press 
    4. Coffee {if you have a local brewer, this is a GREAT way to support local businesses} 
    5. Coffee accessories {sugar, cream, InBru, etc} 
  10. Board Games 
    1. Educational board games he can use in his classroom
    2. Games for his family
Here are some pictures of gifts I got for my sons' teachers: 

Homemade strawberry jam with homemade biscuits 

Flashlight 

Found this printable HERE. I have paired this with sticky notes that are shaped like apples AND I attached one of these to an apple pie. 

This goes great with a coffee cup filled with those single serving instant coffee packages. Go HERE for the printable. 


Here are some websites that have printables that can be paired with gifts: 

  1. Crazy for Crust 
  2. How Does She 
  3. Moms By Heart
I sure hope this helps. Supporting teachers and getting gifts to show our appreciation is so very, very important. Teachers are overworked and underpaid, but they love your kids. They need reminders of why they are there: for the kids. Whether your child's teacher is male or female, I pray this helped you when you are looking to purchase gifts for your child's teacher in the years to come. 

Saturday, June 1, 2013

Alphabet Days Summer Curriculum

If you have young children and are blessed with the opportunity to stay at home with them all summer long, you may be craving for a way to entertain and educate your child all while having fun and saving money. When it came to the summer when my boys were turning 3 and 2, I decided to come up with a schedule of sorts that did all of the above things. I was able to use this curriculum, with slight changes in activities or food, for three summers.

Since I was still teaching, I only had about 80-90 days to work with, which is around 12 weeks. I always try to give a buffer of at least two weeks after school gets out and before school lets back in. I needed time to decompress from 180 days of constant educating, and I would need a few weeks before school started to get geared back up, finalizing lesson plans, making copies, setting up my classroom, etc. So when I decided to do "Alphabet Days" with my kids, that gave me about 5 weeks, Monday-Friday of little activities. Most of them were either FREE or inexpensive. I focused on going to places around my area of Charleston, South Carolina. I also tried to include making something {food or crafts} at least once a week. I also try to make my first week around the Fourth of July, so we can do something with "F"lags.

So if you need some ideas, please see my list. If you are from Charleston or the surrounding areas, this will apply to you. BUT if you are not from this area, please use this list as ways to create your own list of places and activities in your area.

Each day we focus on a letter of the alphabet. We started this week (June 29th) and will be doing this on the week days. Each day is focused on an activity (whether we go some place or do something at home) and then focus on a food that starts with that place. If you would like to come or have ideas for letters (keep them local and cheap, please), let me know. 

A: Angel Oak Tree, applesauce
B: Bee City, banana split
C: Chalk drawing, cookies
D: Dip in the pool, donuts OR hot Dogs at Perfectly Franks 
E/F: Fourth of July Events and crafts, Exercise Fun
G: Cypress GARDENS, grapes 
H: House of Bounce {This is one of those bounce castle places} 
I: In-house movie, make your own Ice cream 
J: Jam day (pick blueberries and make some jam)
K: Kites and Krispe Kreme
L: library and making Lemonade
M: Children's Museum and Moes
N: Northwoods Mall play area and nuts {Make nut butter, almond, peanut, etc}
O: Outside all day (probably the park) and oranges
P: making Pizza, make Pottery {out of playdough}, make Pancakes  
Q: quiet time and Quiznos 
R: Racoon (I have a friend who raises them) and raisins
S: Swamp (Beidler Forest) and Spaghetti
T: Turtles at Charlestowne Landing 
U: Umbrellas in sprinklers 
V: sounds of Violins, make onion rings out of Valdalia onions, study Venus fly traps 
W: Water and watermelons
X: Pirate Cove (for X marks the spot, thanks, Kim for the idea) and making Xylophones
Y: York Town 
Z: End it with the ZOO!!


Here are some pictures of the kids doing "Alphabet Days" through the summers: 


Making "H"ouses 

Homemade "D"onuts 

Reviewing "K"

"P" shaped "P"ancakes with "P"inapple pieces 

Making "P"izzas 

If you noticed with the "K" day, I also had worksheets for them. I have two sites I LOVE to use when looking for worksheets. Please check them out: 

1. Hubbard's Cupboard 
2. 2 Teaching Mommies 

Tuesday, May 21, 2013

Debney's Summer Curriculum 2013, "Discover SC"

Summertime is coming, and as a mother of three children, I have to have some sort of order and organization in place while my kids are home for the summer. For the past few years, I have done quite a variety of curriculum with my kids, my most "famous" being the "Alphabet Days" where we take a letter each day and explore our area, make something, and practice writing words that start with that letter {example, pick 'B'lueberries on 'B' day}. When my kids were younger, this was GREAT.

Then last summer I realized that my kids were getting older, and trying to convince my 7-year-old that "it's fun reviewing words that start with 'E' while we are making boiled 'E'ggs" was just not cutting it anymore. So I created a themed curriculum and schedule for the summer. See HERE for my "Summer Schedule 2012".

This summer, I am faced with a rising GATE {kind of like honor classes for elementary school} 3rd grader, a rising 2nd grader, and hopefully a rising preschooler. I wanted to do something that would not only teach them through the dog days of summer, but give them something to learn and be proud of. As a proud South Carolinian, and an avid festival-goer, I decided on a curriculum that would teach my kids about the very different parts, cultures, and history of the Palmetto State. I want to share it with you, in hopes that 1. if you are from SC, you will join us in discovering the state, and 2. if you are not from SC, you will either come visit or use this as a springboard to discover your own state.

I spent a lot of time searching my favorite SC website, sciway.net for festivals, activities, restaurants, accommodations  and so on in order to decide what I wanted to cover this summer. At first I thought about going through two or three counties per week, and then at the end of the week we visit one of the counties. Then I listed all the festivals that were going on throughout the summer in our state. There are a TON. And I decided this would be the way to go for this summer. So here is what we Debneys are doing this summer:

Here's my "Organization Door":


Discover SC, Summer 2013 Curriculum

I am giving my children a two week buffer after school gets out and two weeks before it starts again so they get a bit of a mental break. Although, I will do a brief overview of the state flag, dance, song, bird, animal, drink, etc. We also will be working only Monday-Friday, unless we decide to carry the festival over into Saturday as well.

Here's a close up of how I keep up with what we are doing for the month and each week:


Basic Weekly Outline:

Monday: Make something Monday {This will serve as a review of the previous week, and hopefully we will make something after we have learned more about it at the festival}

Tuesday: Teach Me About It Tuesday {This will be the day I introduce the area, theme, culture, etc that we will be learning about that week}

Wednesday: Where are we going Wednesday {This will be our research day. We will go to the library, the internet, and the various books my husband and I already have about SC to learn more about where we are going}

Thursday: Think About It Thursday. {We will make something that represents either the area, the festival, or the culture we are going to visit}

Friday: Field Trip Friday. {To the festival we go}

Specific Weekly Outline: 

June 17-21:

  1. Monday: Review all the state's "things" {flag, birds, drink, etc}
  2. Tuesday: "What is the Carifest?" 
  3. Wednesday: Caribbean Culture in SC
    1. Raggae/Soca music
    2. Dancing
    3. Food
  4. Thursday: Create a "festival" mask
  5. Friday: Go to the Carifest in Charleston, SC
June 24-29
  1. Monday: Caribbean Festival Party for lunch 
  2. Tuesday: What is Carolina Day? 
  3. Wednesday: Revolutionary War in SC
    1. June 28, 1776
    2. Fort Sullivan
    3. Moultrie
  4. Thursday: Create a SC map of all the Revolutionary Warsites
  5. Friday: Carolina Day on Sullivan's Island
July 1-5:
  1. Monday: Make the different flags, especially SC flags, of the Revolutionary War {Make Flag t-shirt for the 4th of July}
  2. Tuesday: Lexington Peach Festival
  3. Wednesday: Research peaches
    1. What is the best weather? 
    2. What types of peaches? 
    3. When is the best time to pick? 
    4. What are the "best" peach recipes? 
  4. Thursday: Create a chart of the benefits of peaches for the human body
  5. Friday: Lexington Peach Festival
July 8-12: 
  1. Monday: Make Peach cobbler, peach pie, and/or peach preserves 
  2. Tuesday: BBQ and Blues in SC
  3. Wednesday: The history of BBQ and Blues in SC
    1. What are the different types of BBQ in the state? 
    2. Where did the Blues thrive in SC? 
  4. Thursday: Make BBQ seasoning and sauce
  5. Friday: Go to the Festival of Discovery in Greenwood, SC
July 15-19: 
  1. Monday: BBQ cookout dinner
  2. Tuesday: Beaufort
  3. Wednesday: Discover the importance of Beaufort, SC
    1. What role did all the waterways play in the history of SC? 
    2. Research the importance of Beaufort's culture
    3. Research the lighthouse 
  4. Thursday: Water experiments {make clouds, rain, snow, and ice}; the benefits of all of it. 
  5. Friday: Beaufort Water Festival
July 22-26: NOTE: this week is still in the works. I wanted to go to The Palmetto Tasty Festival, but still deciding. 
  1. Monday: Create boats
  2. Tuesday: 
  3. Wednesday: 
  4. Thursday:
  5. Friday:  
July 29-August 2
  1. Monday: Can tomatoes and make tomato paste. Use some tomatoes to make pasta sauce for dinner. 
  2. Tuesday: Gullah and Geeche Heritage 
  3. Wednesday: Learn about the Gullah language
    1. Where did it come from? 
    2. Is it still spoken? 
  4. Thursday: weaving and storytelling
  5. Friday: Gullah and Geechee Festival in St. Helena 
August 5-9
  1. Monday: Create a Gullah Cuisine dinner 
  2. Tuesday: Review and reflect on what we learned during the summer. 


Friday, November 30, 2012

My Musings on Knitting; Epiphanies that Come from Hours of Creating

"Through the knot, in the back, loop over, pull through, pull off...through the knot, in the back, loop over, pull through, pull off..."

I literally had dreams of this last night after my first attempt at knitting. My desire to begin knitting came from seeing some beautiful balls of yarn at Big Lots. I know there are all kinds of crafts I can do with yarn, but each time I saw those beautiful threads, I was pulled back in my memories of a time where I remember my grandma sitting on the couch creating all kinds of things. Before I knew it, I had a little spur in my tush to buy some yarn and get to teaching myself how to knit.

After about 2 hours of a frustrating start, I finally got it. Well, let me back up a minute and explain how I got to that point. I started to buy a book at AC Moore on beginning knitting, but decided that the Internet was full of people who know what they are doing, and are willing to show me for free, so on to Pinterest and YouTube I went {see below for the sites I found helpful}. I stood in front of my computer with my supplies and tried, and tried, and tried, and tried again to get started. I had 3 Tabs with knitting techniques opened, and I flipped back and forth with them. Suddenly I found myself in a rhythm, and I had about 3 rows of something started. So I carried my supplies to the living, sat cross-legged on my couch, and knitted away while watching Big Bang Theory.

And I stayed up waaayyyy later than I normally do looping and pulling that beautiful yarn.

And I dreamed about it all night.

And I read my Bible Study while working on the next few rows.

This is what I learned while knitting:


  1. My hands are gaining new muscles. I'm not sure if I was doing it right, or if I was just holding on to the yarn too tight, but I went to bed with sore hands. It made me think of my grandma and all her older lady friends who would spend hours knitting. Either they had strong hands, they were doing it right, or they suffered because of arthritis. But I never heard her complain. Which gave me a more respect for her. 
  2. My eyes hurt. This happened this morning. I was just-a whirling away with the yarn when my eyes started to hurt. At one point I looked up from my knots and loops, and my eyes were shocked that the sun had come up. I realized that I was holding the wanna-be scarf about 6 inches from my face. Whoa, baby. I now have to stop every few minutes to make sure I pull my masterpiece in the making away from my sore eyes. And again, it made me think of my grandma. 
  3. I have a new addiction. Not sure why knitting is so addictive, but I found myself wanting to bring my  yarn and needles to car line. I wanted to knit instead of eat breakfast. I was willing to stay up LATE just so I could add a few more rows. Every time I would finish a row, thinking "this is the last one", I would go, "okay, one more." And I repeated that process over and over again. No wonder why my grandma was constantly giving me new knit socks every time I turned around. I think she was addicted, too. 
  4. I had a sudden urge to use my rocking chair. There's something about getting into a rhythm that made me desire being in my rocking chair. Having the yarn in my lap is not cumbersome, and I knew the rhythm of the rocking would help me with the rhythm of the knitting. 
  5. Apparently, I had a lot to think about. While looping and pulling, my mind ran crazy. I was thinking of all kinds things, great and small. Even this list came up as I was knitting. I thought about my kids. I thought about my grocery shopping list. I thought about updating my blog. I thought about music {I have Christmas piano music playing}. I thought about books I like to read, and how maybe I need to get another audio book to listen to while knitting. I thought about all the things my grandma used to make while knitting. I examined a blanket my great-grandmother made me with awe. I had a LOT to think about, apparently, and knitting brought it out in me. Which, again, made me think of my grandma. She was very child-like in her later years, and I always just thought she was losing her mind. But she knitted. All the time she knitted. And if she was knitting, she was thinking. So all that time I thought she was just being an old lady, she was probably solving world problems in her head, and quietly praying for all her grandkids as well. 
  6. I love small victories. I was seriously getting frustrated when I started. I almost came to tears quite a few times as I struggled to understand exactly how I was supposed to loop and when I was supposed to pull. But when I got it, I was filled with relief. And then this morning, as I got frustrated over one particular loop that I had messed up a few rows back, I was thinking I was going to have to be happy with a slight gap in the scarf. BUT, after studying the yarn, I saw exactly what I needed to do to fix the gap, and I was back in the game. My chest swelled with pride. It's the small victories that can be the sweetest. 
  7. I can sit still. If you know me, you know my schedule is c-ray-zy. I am constantly doing something. But knitting made me sit back and relax. There is just something calming about creating something warm and fuzzy. 
  8. Most importantly: I should have appreciated my grandma more. Each row made me think of Ruby. I think of how ungrateful I was for all the things she made me. I think of how I spoke to her. I think of how I treated her. No, I wasn't cruel or anything, but I was immature. I had a special treasure in my grandma. I told my children this. And they probably thought the same thing I did, "Yeah, ok, mom." But I now have a desire to teach at least my daughter how to knit. It would be a shame if another generation went by without learning how to do it. My grandma tried to teach me how to knit quite a few times, but I brushed her {and the knitting} off as being something only old ladies did. More times than I can count, I said out loud, "Oh, grandma, if only you could see me now." I gained a new respect for my grandma through this. 
So that's it for now. If you have been knitting for a while, please share some of the things you have learned while knitting. If you haven't been knitting, you really should give it a shot. You might be surprised at what you learn...about yourself, and about those around you. 

Here's what I've done so far: 


Sources I used to learn how to knit: 
  1. Queen of DIY
  2. All Free Knitting  I'm thinking this is the sister site of Allfreesewing and Allfreecrafting that I follow. 
  3. YouTube video: Beginner Knitter
If you have another source, please comment below so others can learn as well. 

Happy Knitting, everyone. :}  

Wednesday, November 28, 2012

Guest Post: Birthday Blitzing; Using Your Special Day to Bless Others

Birthdays are just wonderful, aren't they? It's a day when all your friends and family stop to recognize you and bless you with tokens of their affection. Some make a BIG deal of their birthdays; others let the day come and go with barely a mention, noted only by the closest friends and family.

But what about making YOUR special day special for others

Just recently, a long-time friend of mine, Jennifer Holstein, posted on Facebook something incredible. She chose to make her birthday a time to go out of her way to make others, those she knows and those she will never even see, feel special. Here's her list and some pictures of what she did for others:


Birthday Blitz- the complete list!

1. Made brian breakfast and walked Lucas so he could enjoy it.

2. Left a treat in the mailbox for the mail lady.
3. Left popcorn on the Redbox
4. Took goodies to my long time doctor and her nurse.
5. Took treats to our babysitter.
6. Goodies for the bank teller who was SO nice.
7. Paid admission for 5 people at Wannamaker Park.
8. Gave a goody bag to the kid work
ing the booth at Wannamaker.

9. Bought a sweet old couple breakfast.
10. Left encouraging notes on cars at Trident Cancer Center.
11. Left congratulation card on cars at the Birthing Center.
12. Left nice notes on the mirrors in Target dressing rooms.
13. Drove to work and left a note on my mom's car.
14. Taped quarters to a soda machine at Tanger.
15. Left a note that said "you're a great mom" in Tanger's nursing area.
16. Left quarter on ride toys.
17. Treated a little boy waiting with him mom to a ride on the merry go round.
18. Took a goody bag to this sweet lady at Sam's who always remembers my name.
19. Took dog toys, cat toys and human treats to the Charleston Animal Shelter.
20. Left a 100% tip on my lunch.
21. Fed about to expire meters downtown.
22. Left pennies for wishing at Waterfront Park fountains.
23. Gave some lost tourists directions.
24. Surprised Brian at work.
25. Left a treat for the massage therapist who fixed my back. 
26. Encouraging messages in certain subjected books at Barnes & Nobles (weight loss, self help, parenting)
27. Left a happy note on the B&N mirror.
28. Wildly applauded the little boy who was singing in the kids section and got treated to a little concert.
29. Took treats to all the workers at the West Ashley Red Cross.
30. Let tons of people into traffic all day.
31. Left quarters in grocery store toy machines.
32. Picked up Lucas early- which he loves.
33... and my favorite- Brought flowers to a brand new mom who just had her baby today. ♥


So after seeing this, I asked Jennifer if could share where she got her idea, the reactions she received from those she was blessing, and any future plans. Here is her response: 


"I read this article {read link} over the summer and was absolutely inspired by it.  He mentions another person who did something similar and I read that too.  I thought it was a fantastic idea!  I’ve always loved my birthday and 3 has always been my husband’s & my lucky number.  Since this was my 33rd birthday, I wanted to do something really special.

I decided that I wanted to do the same thing for my birthday.  So I started to make a list.  I thought of people in my day to day life that are kind to me, that never get acknowledged like they should.  I thought of inexpensive ways I could leave kindness for strangers.  I thought of organizations that I care about or places that just plain make me happy.  And I left some blanks for places where I was just inspired by the day.

I had a handful of ideas.  I made gift bags full of hershey’s kisses and I made little tags that said “Today is Birthday…and I’m celebrating by giving to others” with a space to write a personal note.  I made some for specific people- my doctor and her nurse, the humans at the Charleston Animal Shelter, our long time babysitter, a lady at a store I frequent who is so nice, our mail lady and the folks at the Red Cross (I’m a long time blood donor).   I made a bunch more to just have as the mood stuck me.  I also made dog and cat treats for the animal shelter.

I took a bunch of the cards and wrote little messages on the back- just encouraging things that would make me smile if I read them. 

My car looked like a mobile office- I had pens, tape, markers…  If you want to do this yourself, be prepared!  I wish I’d have packed some water. 

I planned out my day to begin in Summerville, where I live.  All of those were planned stops.  I needed to hit the bank and my teller was so friendly and sweet, I sent a treat bag with a note back through the tube before I left- that was my first unplanned kindness.

I had a free drink at Dunkin’ Donuts, so I get my drink and a $10 gift card.  While I was doing this, an older couple came in behind me. They were talking about what to get for breakfast.  When my drink was done, I turned around and handed them the card and wished them a great day.  They were so surprised and pleased. 

Most of the things I did- I never saw the people who received them.  I just liked the idea of someone coming across it and making them smile.  The handful of people who I did something for directly (the little boy on the merry go round, the lunch tip, the boy at Barnes & Noble, the Red Cross folks, the nurses at the maternity ward) were so surprised and almost taken aback.  It so strange to think that we go so long between acts of kindness that it is almost shocking when it happens.  I’ve always believed that the best way we can live is to simply look out for others… smile at a stranger, hold a door for a mom…  be kind to each other. 

It was without a doubt the best birthday I’ve ever had.  I felt so blessed, like the universe was just filling me with positive energy and I’m so energetic about what this 33rd year of my life will bring."
So my challenge to you, dear reader, is this: 
How can you bless others? For your birthday, for Christmas, for Veterans Day...for no reason at all, how about take the time to make someone else's day brighter. 
It doesn't have to be expensive, time consuming, or even anything that takes a lot of planning. I am thinking of making this one of my New Year's Resolutions for 2013. How about you? 

Thursday, June 21, 2012

Crafting: Cub Scout Themed Birthday Party

Six months ago, the day after my daughter's birthday party ("Star" theme), little Abi was already planning her birthday party for next year, the ever-so-popular Lady Bug theme. Not to be left out, my sons wanted to go ahead and plan their birthdays as well. Jed was finally going to get his "Spiderman" party (which I have no picture for...the decorations were...compromised....before I could get my camera out) and J wanted a Cub Scout party. Cub Scout party?! Yes! My brain immediately started flowing with ideas. I could totally do this! At that time, my son had been in Cub Scouts for about 5 months, and I used to be camp counselor for Girl Scouts at Camp Low Country. J was getting to the age where he didn't have to invite all his friends and family anymore, and having one that was Cub Scout themed would limit it to just boys. AND he had been begging for a party where his friends camp out in the back yard. This was going to be fun!

So the planning began. About 3 months ago, I began sitting down and brainstorming what could be done at such a party, and decided the boys could work on getting "badges" for various events. The guest gifts would be easy enough (which, by the way, the list of things I wanted to give them dropped drastically as we had to make adjustments to our budget, but we what ended up doing was sufficient). The food would be simple but fun. The games would be perfect for the boys to do on a bright almost-summer day. I already gave you a brief peek at the birthday party when I talked about my schedule and the food, but now to address putting it all together. It really was a fun party, and I am happy to share it with you!

Cub Scout Birthday Party
The birthday boy! 


Location:
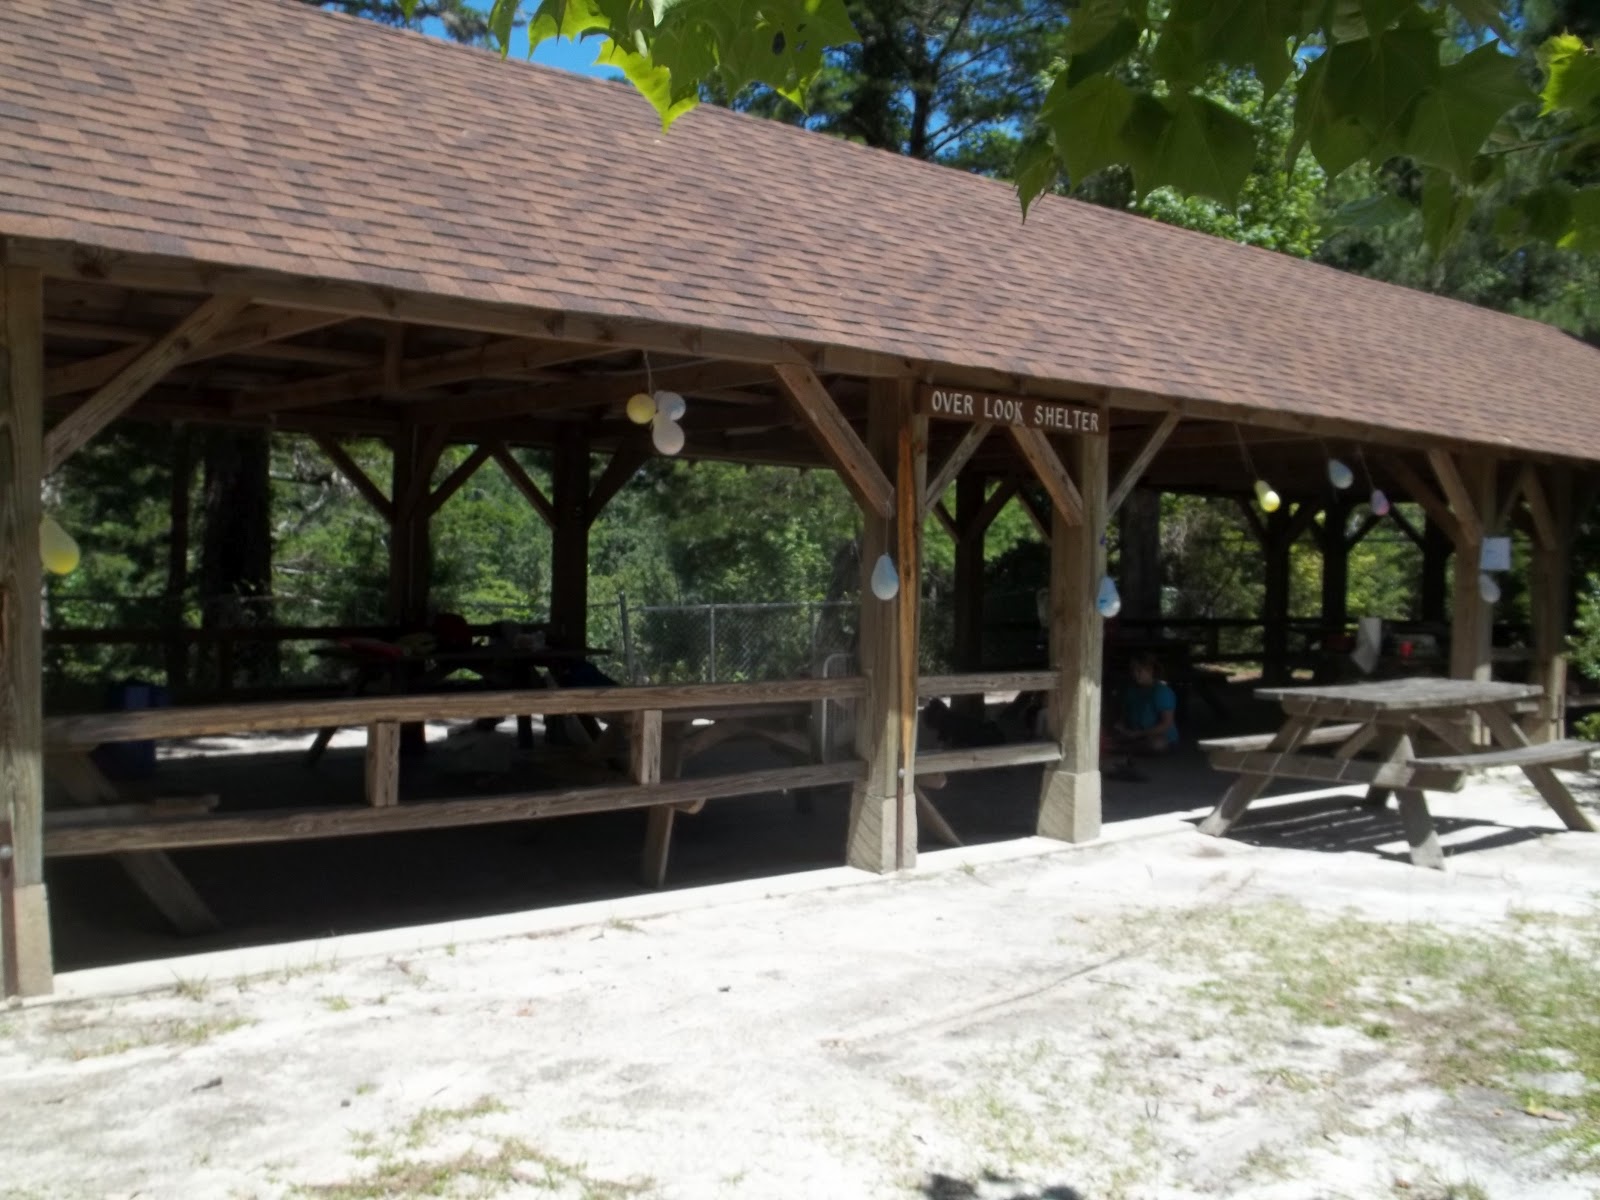
Joseph wanted to camp, and it made sense to have the party outside. I was going to do my backyard, but I thought having off site would be fun, too. One of Summerville's little secrets is Givhan's Ferry State Park. They have two large picnic shelters, camp sites, 3 large fields for activities (already set up for volleyball, baseball, or just activities in an open field), a 1.5 mile hiking trail, and access to the water for swimming, fishing, boating. I chose the smaller of the two shelters, and it was HUGE. For $28, I was able to get a great space, with plenty of parking (right at the shelter), it overlooked the Edisto River, and it was across the road from a huge field. And since the weather was cooperating, it was truly the best spot!


Games and Badges:
So since it was a Cub Scout party, what better way to organize it than to have them "earn badges" for playing around. The boys were all in good spirits about this, and seemed super excited to get their Gold Stars. And since I'm such a teacher (and a mother of 3), it was only natural for me to make a schedule of events. What Cub Scout camping experience is complete without one? Here's the schedule:

And the events were:
Marbles Badge: Playing a Game of Marbles

Sports Badge: Football Drills 

Game Badge: Dizzy Izzy

Archery Badge: Target Practice 


Here's a picture of the bulls eye I made for the Archery Badge
 Next badge...NO PICTURE
 (I was preparing the next badge activity and didn't get back fast enough to take a picture)
Water Badge: Water Balloon Toss 

Chef's Badge: Making Ice Cream 
If you look closely in some of the above pictures, you can see the boys have a key chain with notecards attached. That was how they got their badges recorded. I cut colorful notecards in half, punched a hole in the top, attached a key chain, and then wrote on the cards (in order) the events. Once they completed an event, they came back to me to get a gold star (that I drew on the back of the notecard with a metallic gold pen). Because it was on a key chain, they were able to carry them around to each event. When the entire party was over, each boy got to take the key chain home as part of their guest gift.

Food:
I wanted to make the food pretty simple and be a little "campy" as well. When most people camp, hotdogs are normally involved, and although there was a grill at this picnic shelter, I (wisely) didn't think there would be time to grill them for the party. So I popped them in my crockpot, and thery were ready (and perfect) for the party. All I had to do was cut up some veggies and watermelon, add some chips, and make cupcakes (see food post for details). It turned out to be the perfect amount of food and it tasted great!

Guest Gifts:
I was going to have the boys make their own survival bracelet as part of the event and as part of their guest gift, but we couldn't get a hold of the paracord in enough time, so I decided to do water balloon toss instead. J had made a survival bracelet in Cub Scouts, and I thought it would be fun, but alas, it didn't happen. I was also going to get each boy a boy and arrow, but that didn't happen either. BUT I did end up getting each boy a water bottle and a key chain. And it seemed to work out just fine. They were able to use their gifts all during the party. It worked out great!


After the party, some of the boys piled up in my car and headed to my house for some tent camping. We made s'mores, jumped on the trampoline, and really just had a blast.
Roasting Marshmallows! 
Cinnamon Rolls in the morning...and my poor husband who slept in the tent with the boys. 
 This party was a hit! The kids had a ton of fun, and I think the adults did too! I think the party cost (overall, with the price of the picnic shelter, the food, and the guest gifts) maybe $100. Not too shabby!

Thursday, June 7, 2012

Two-Minute Headband

It's summertime, and I get hot when it's 80 degrees outside. So you can guess that my hair is up in a ponytail most of the year, in my beautiful state of South Carolina where the climate is subtropical (ie, HOT and humid most of the year). And because my hair is chopped "short" in a way that doesn't always keep the hair in the ponytail, I tend to use headbands, scarves, wraps, etc to keep it back, and I try to look somewhat fashionable (because, honestly, I'm inspired by the creative beauty of my friend Kristen...check out her blog and you'll see what I mean). So when I whipped up something yesterday just moments before I left for church, I had no clue how many people would say how much they liked my hair. I mean, I had on jeans, flip flops, a white t-shirt, and a headband, and I had 5 people tell me how fancy I looked. Uh...okay (can you tell I'm the type that doesn't know how to handle a compliment?). I decided to share how I made my cute little headband. It literally took me two minutes to make, and these would work well on really any age, ladies young and old. This is so easy, it will blow your mind! :)

Two-Minute Headband


What You'll Need:


  • 1 inch wide ribbon (I like my base to be a sturdy ribbon, so none of that satin or sheer stuff for the base)
  • 1/2 inch wide ribbon (now here is where I add the fancy stuff)
  • Measuring tape
  • Scissors
  • Pencil
  • A small bottle of liquid stitch (no sewing machine required!!!) 
  • 1 bobby pin 
Instructions
  1. Using the measuring tape, measure the length of your head where the headband will be. 
  2. Cut a strip of your base ribbon to the measurement you just got. 
  3. Cut a strip of the "fancy" ribbon the measurement you got PLUS 6-10 INCHES. You want this part to be longer. How much you want to hang from the back is how much you cut. If you don't want much to hang, then just cut "Measurement + 6 inches". 
  4. Fold the base in half to find the center. Lightly mark the center with the pencil. Do the same for the "fancy" ribbon. (You can mark the inside of the fancy ribbon if you are afraid someone will see your pencil markings). 
  5. Put the centers together, with both ribbons facing UP. Hold with the bobby pin. 
  6. Use the pencil to mark where the base ribbon ends on your fancy ribbon on both ends. 
  7. Pull one side up and apply the Liquid Stitch from the center of the "fancy" ribbon to the marked end. You don't want glue to go over the end of the base because it will then stick to your hair...or table. Gently lay the ribbon flat down the center of the base ribbon and smooth flat. 
  8. Repeat on the other side. 
  9. Go apply lipstick or pull your hair up in a ponytail or something to give the ribbons a few seconds to dry. :) 
  10. Then tie the ribbon around your head. 
Simple. Easy. and Beautiful! You can make one of these for really any occasion. You can make the ribbons larger or smaller as well. I have a small head, so any ribbon larger than that just looks ridiculous on  me, so 1 inch is about as big as I'm going to get. You could also add a little something-something to your ribbon if you like. My friend, Meredith, makes these AMAZING Felt Flowers for your hair. One of those would look just lovely attached to the ribbon as well! 

Here's the headband that got all the attention at church last night...don't mind the tank top.  I'm about to tackle the garden and mow the lawn. :) 

Here's the headband I just made. Representing my team in Garnet and Black. Go Gamecocks!! 


PS: for the 4th of July, I'm thinking of a Blue Base, Red insert, and then (yes! a third ribbon!!!) a star sheer ribbon in the center! I will try to post a picture of it as soon as I buy the ribbon to complete it. :) 

Happy Crafting, everyone!